Setting Up
Sensing Platform
Introduction
This tutorial covers the configuration of the Sensing Platform to connect Nayad for the device management, data collection and visualization.
Device Configuration
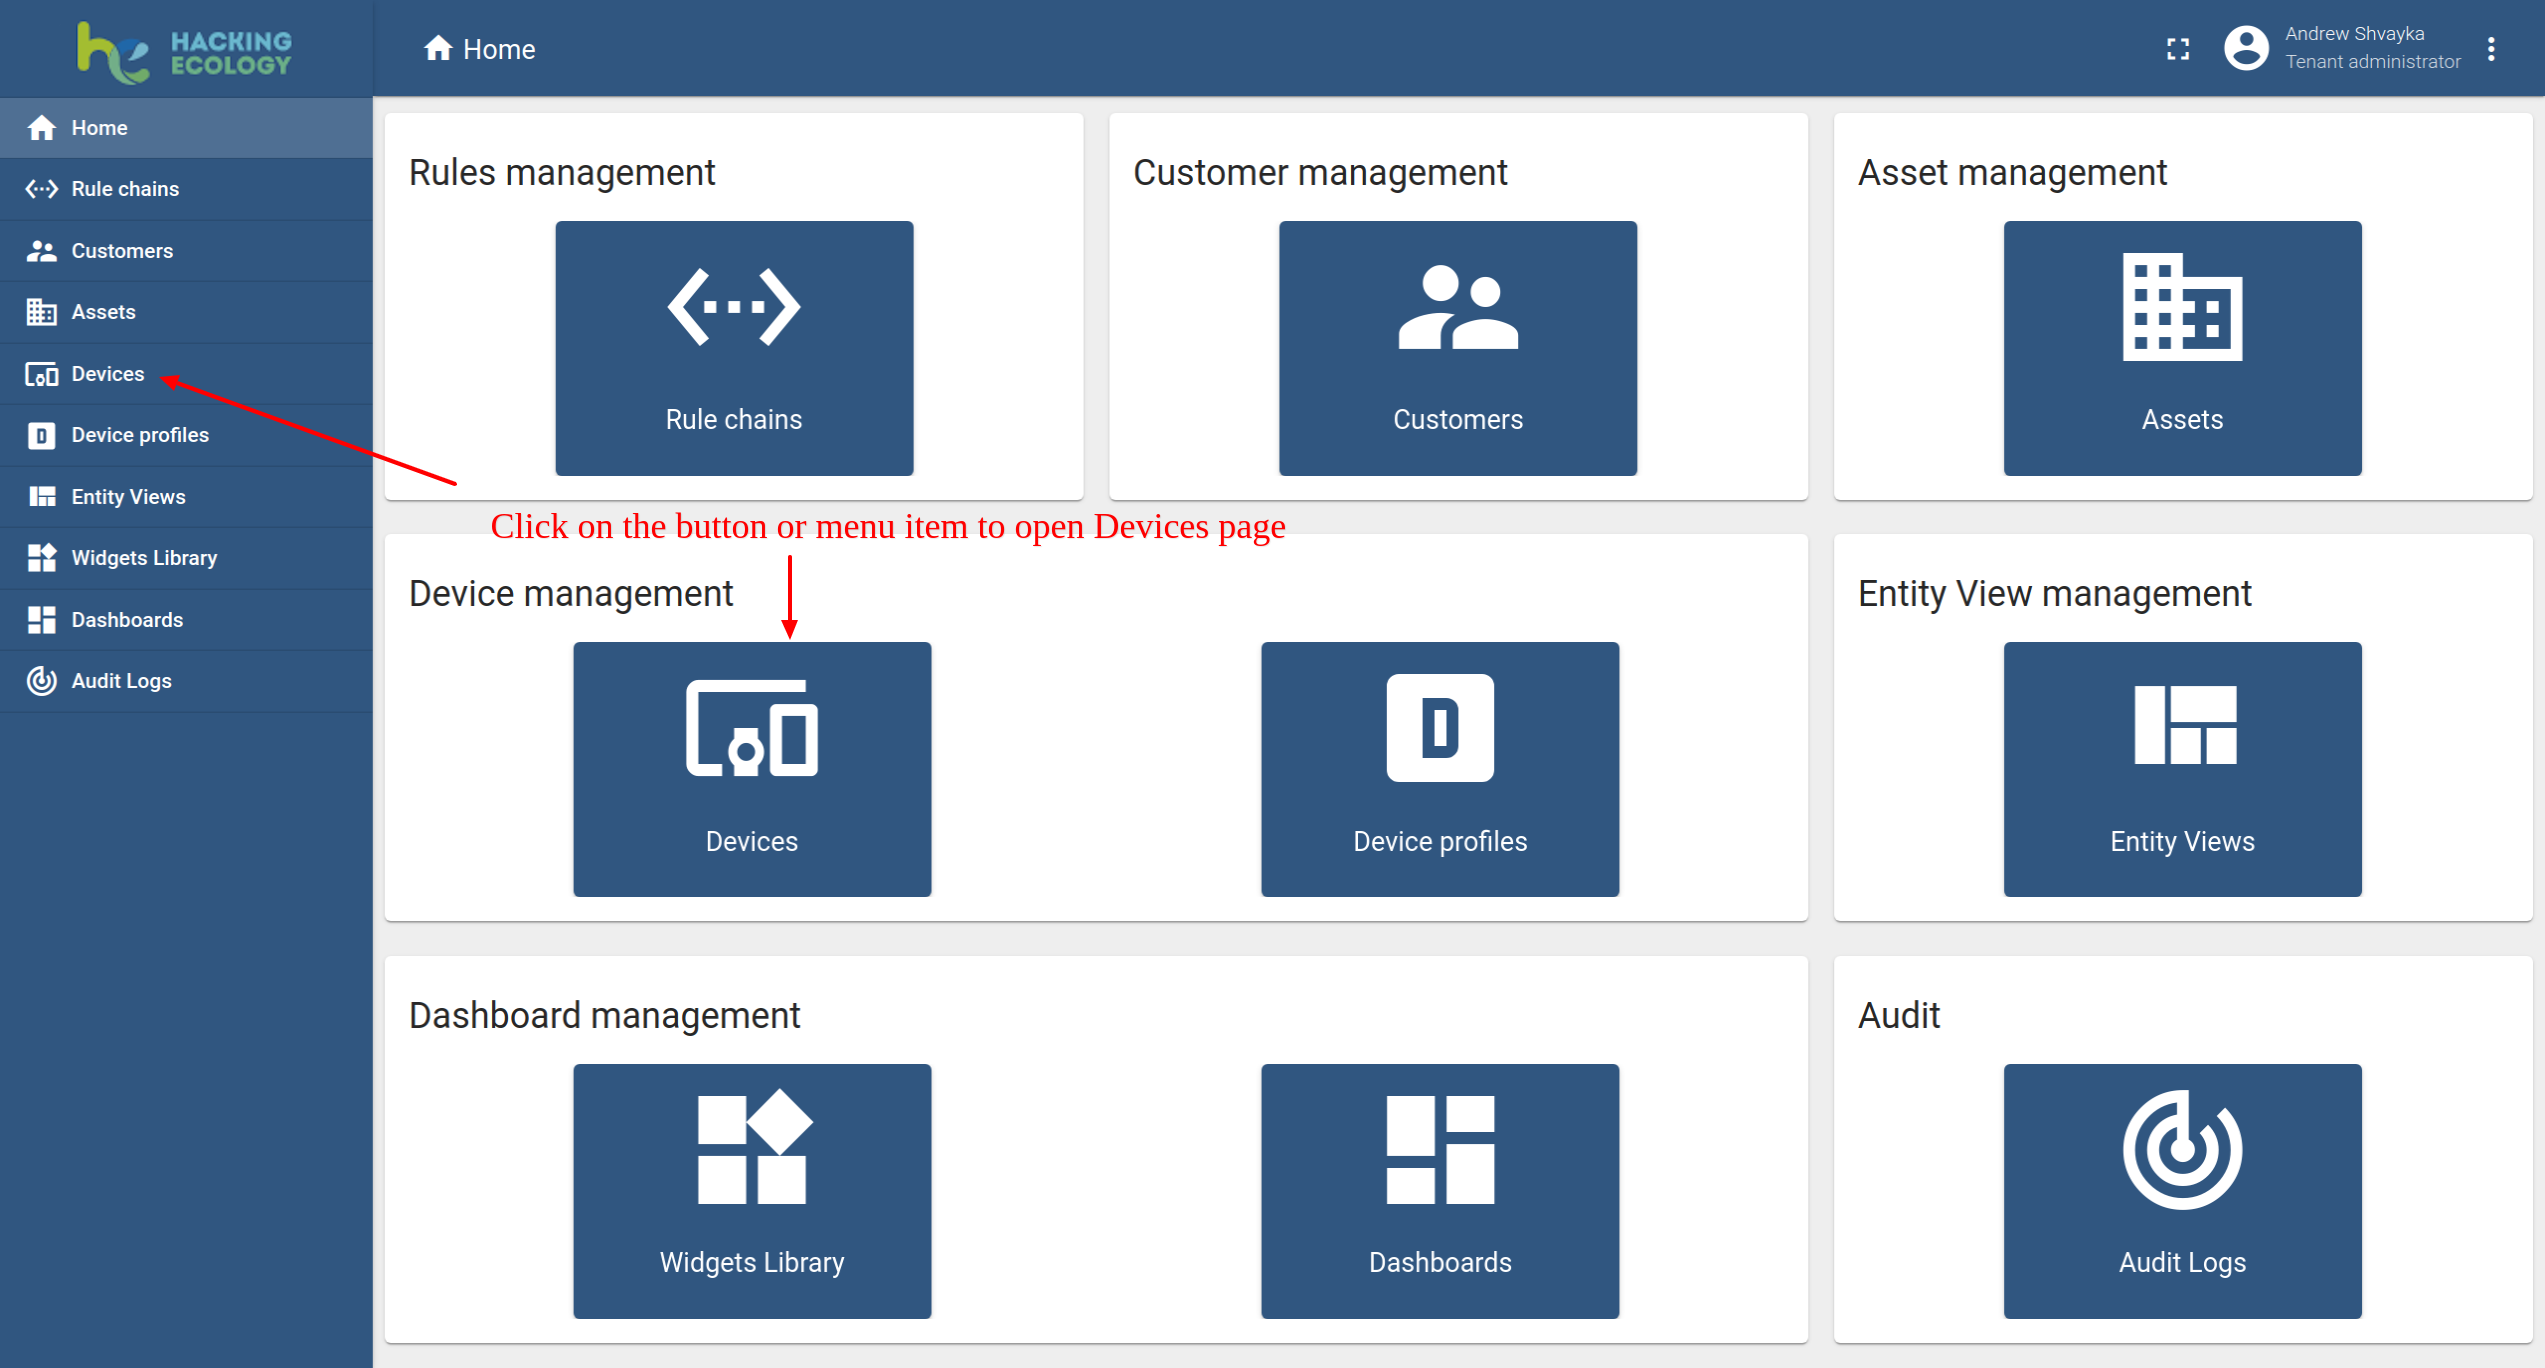
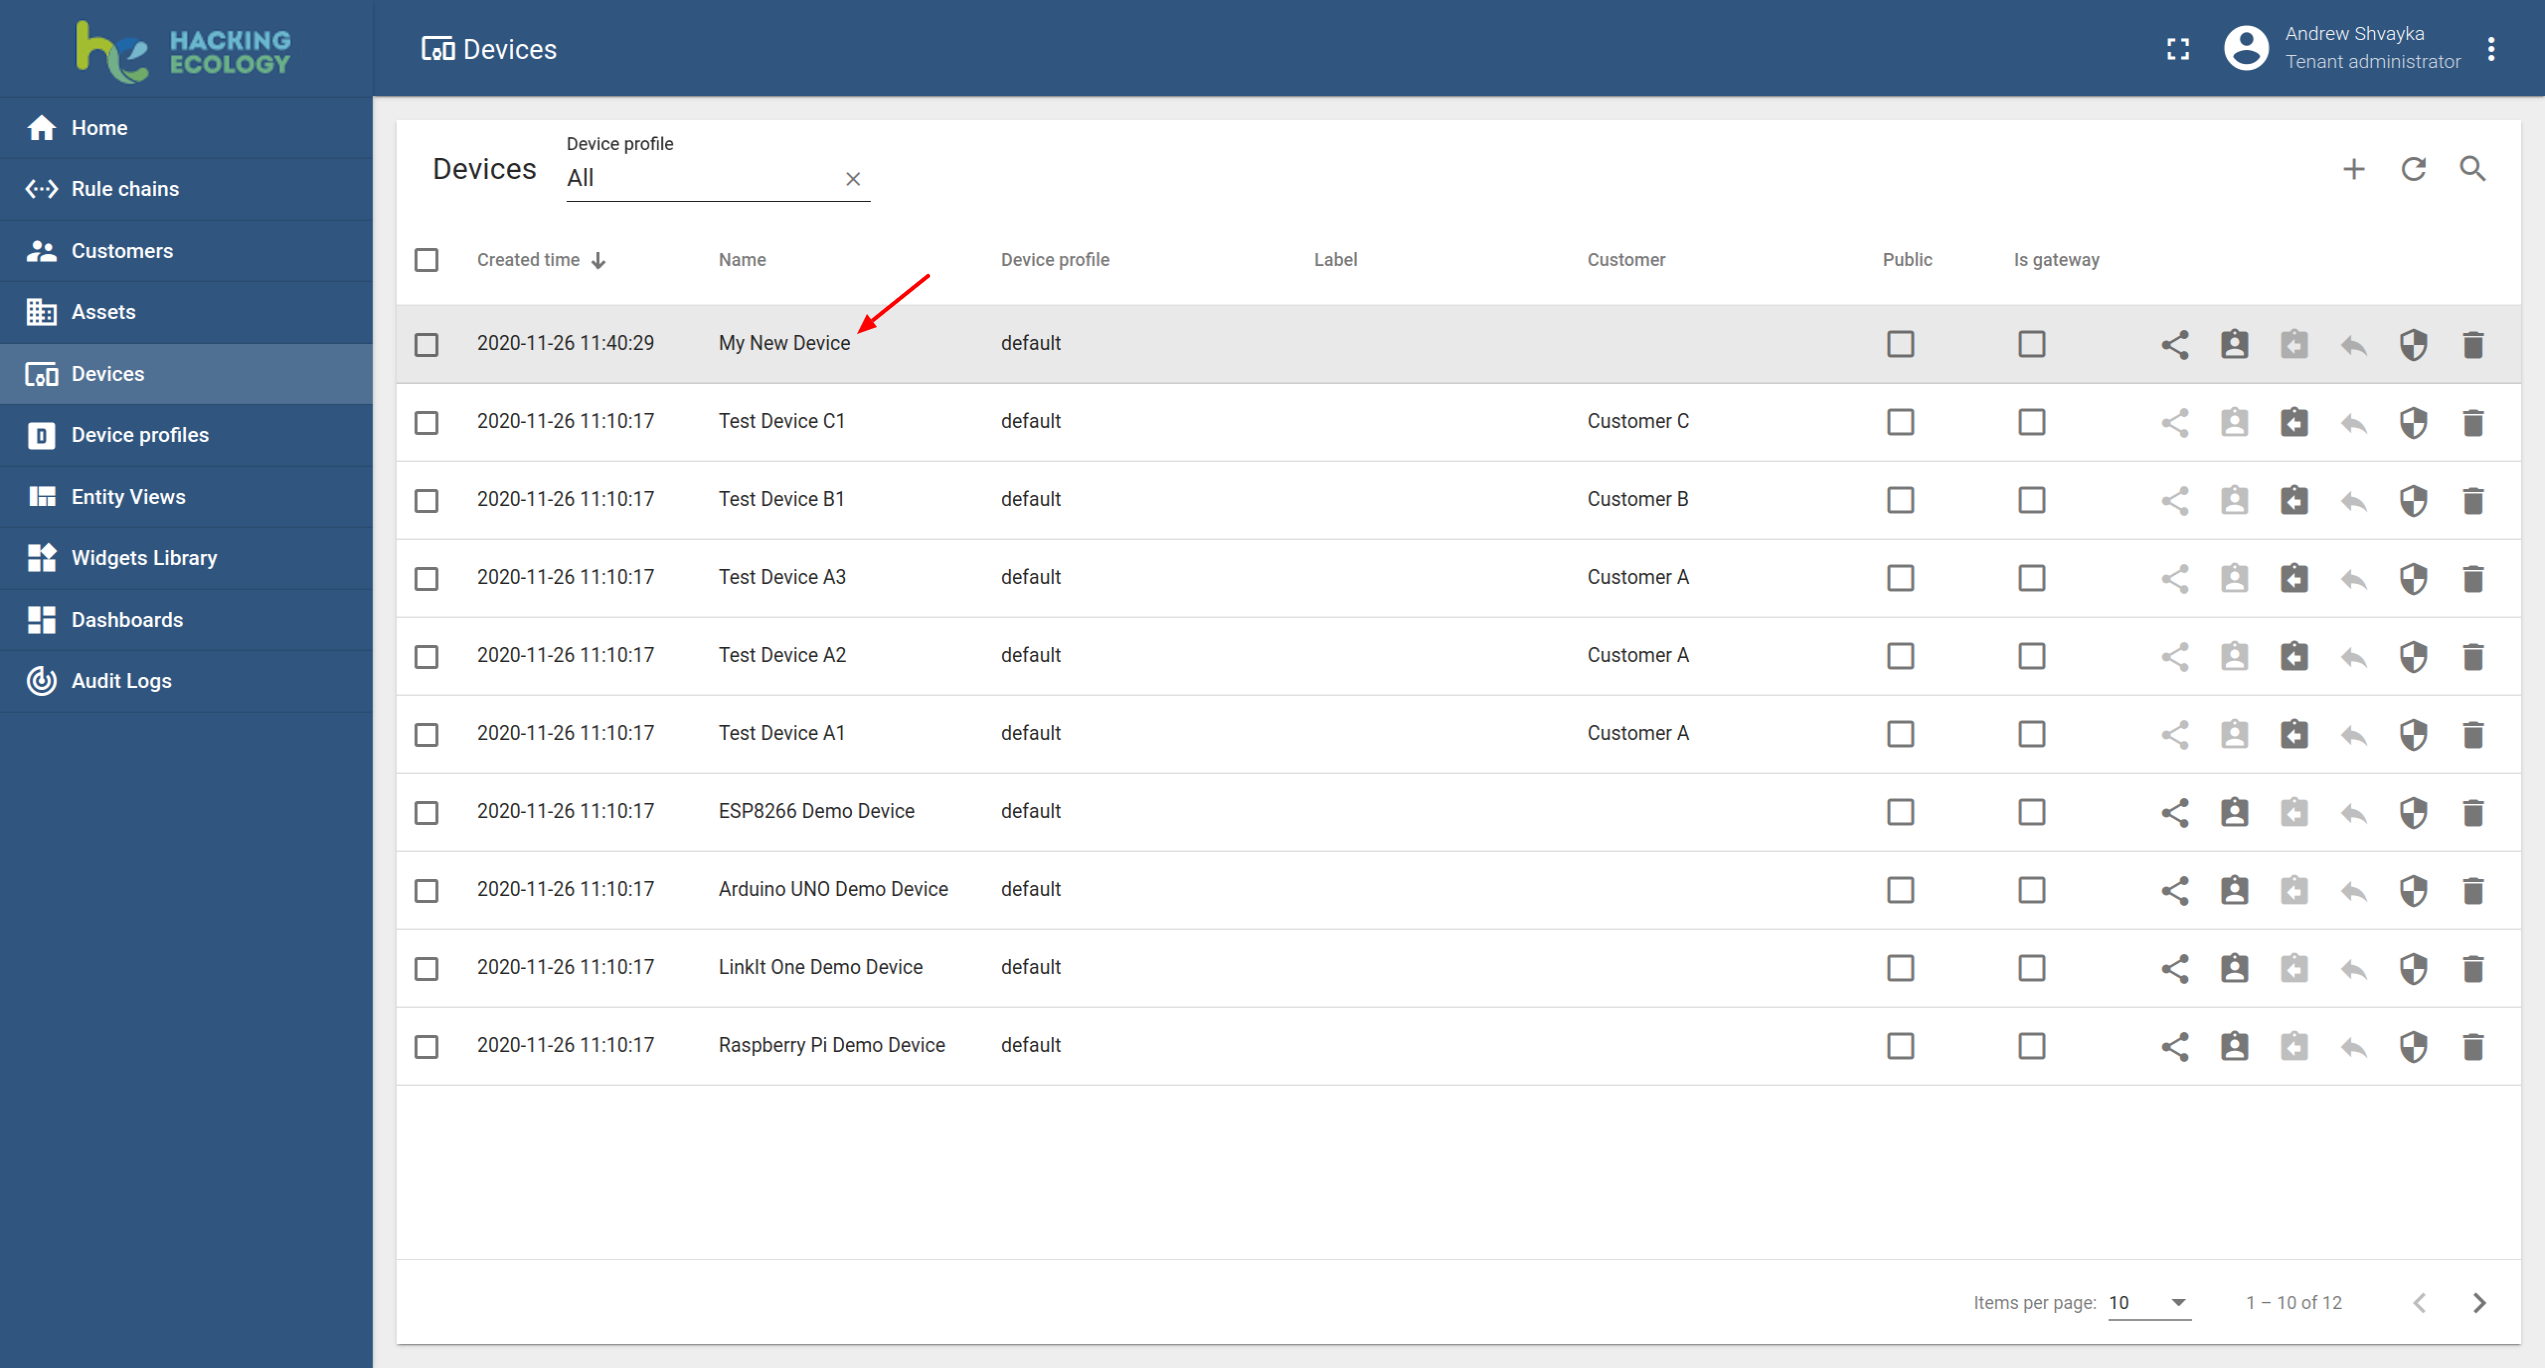
Create a Device
The straightforward way to do it is using User Interface:
- Log into Hacking Ecology Sensing Platform using your credentials and open the left side tab or the “Device” icon.
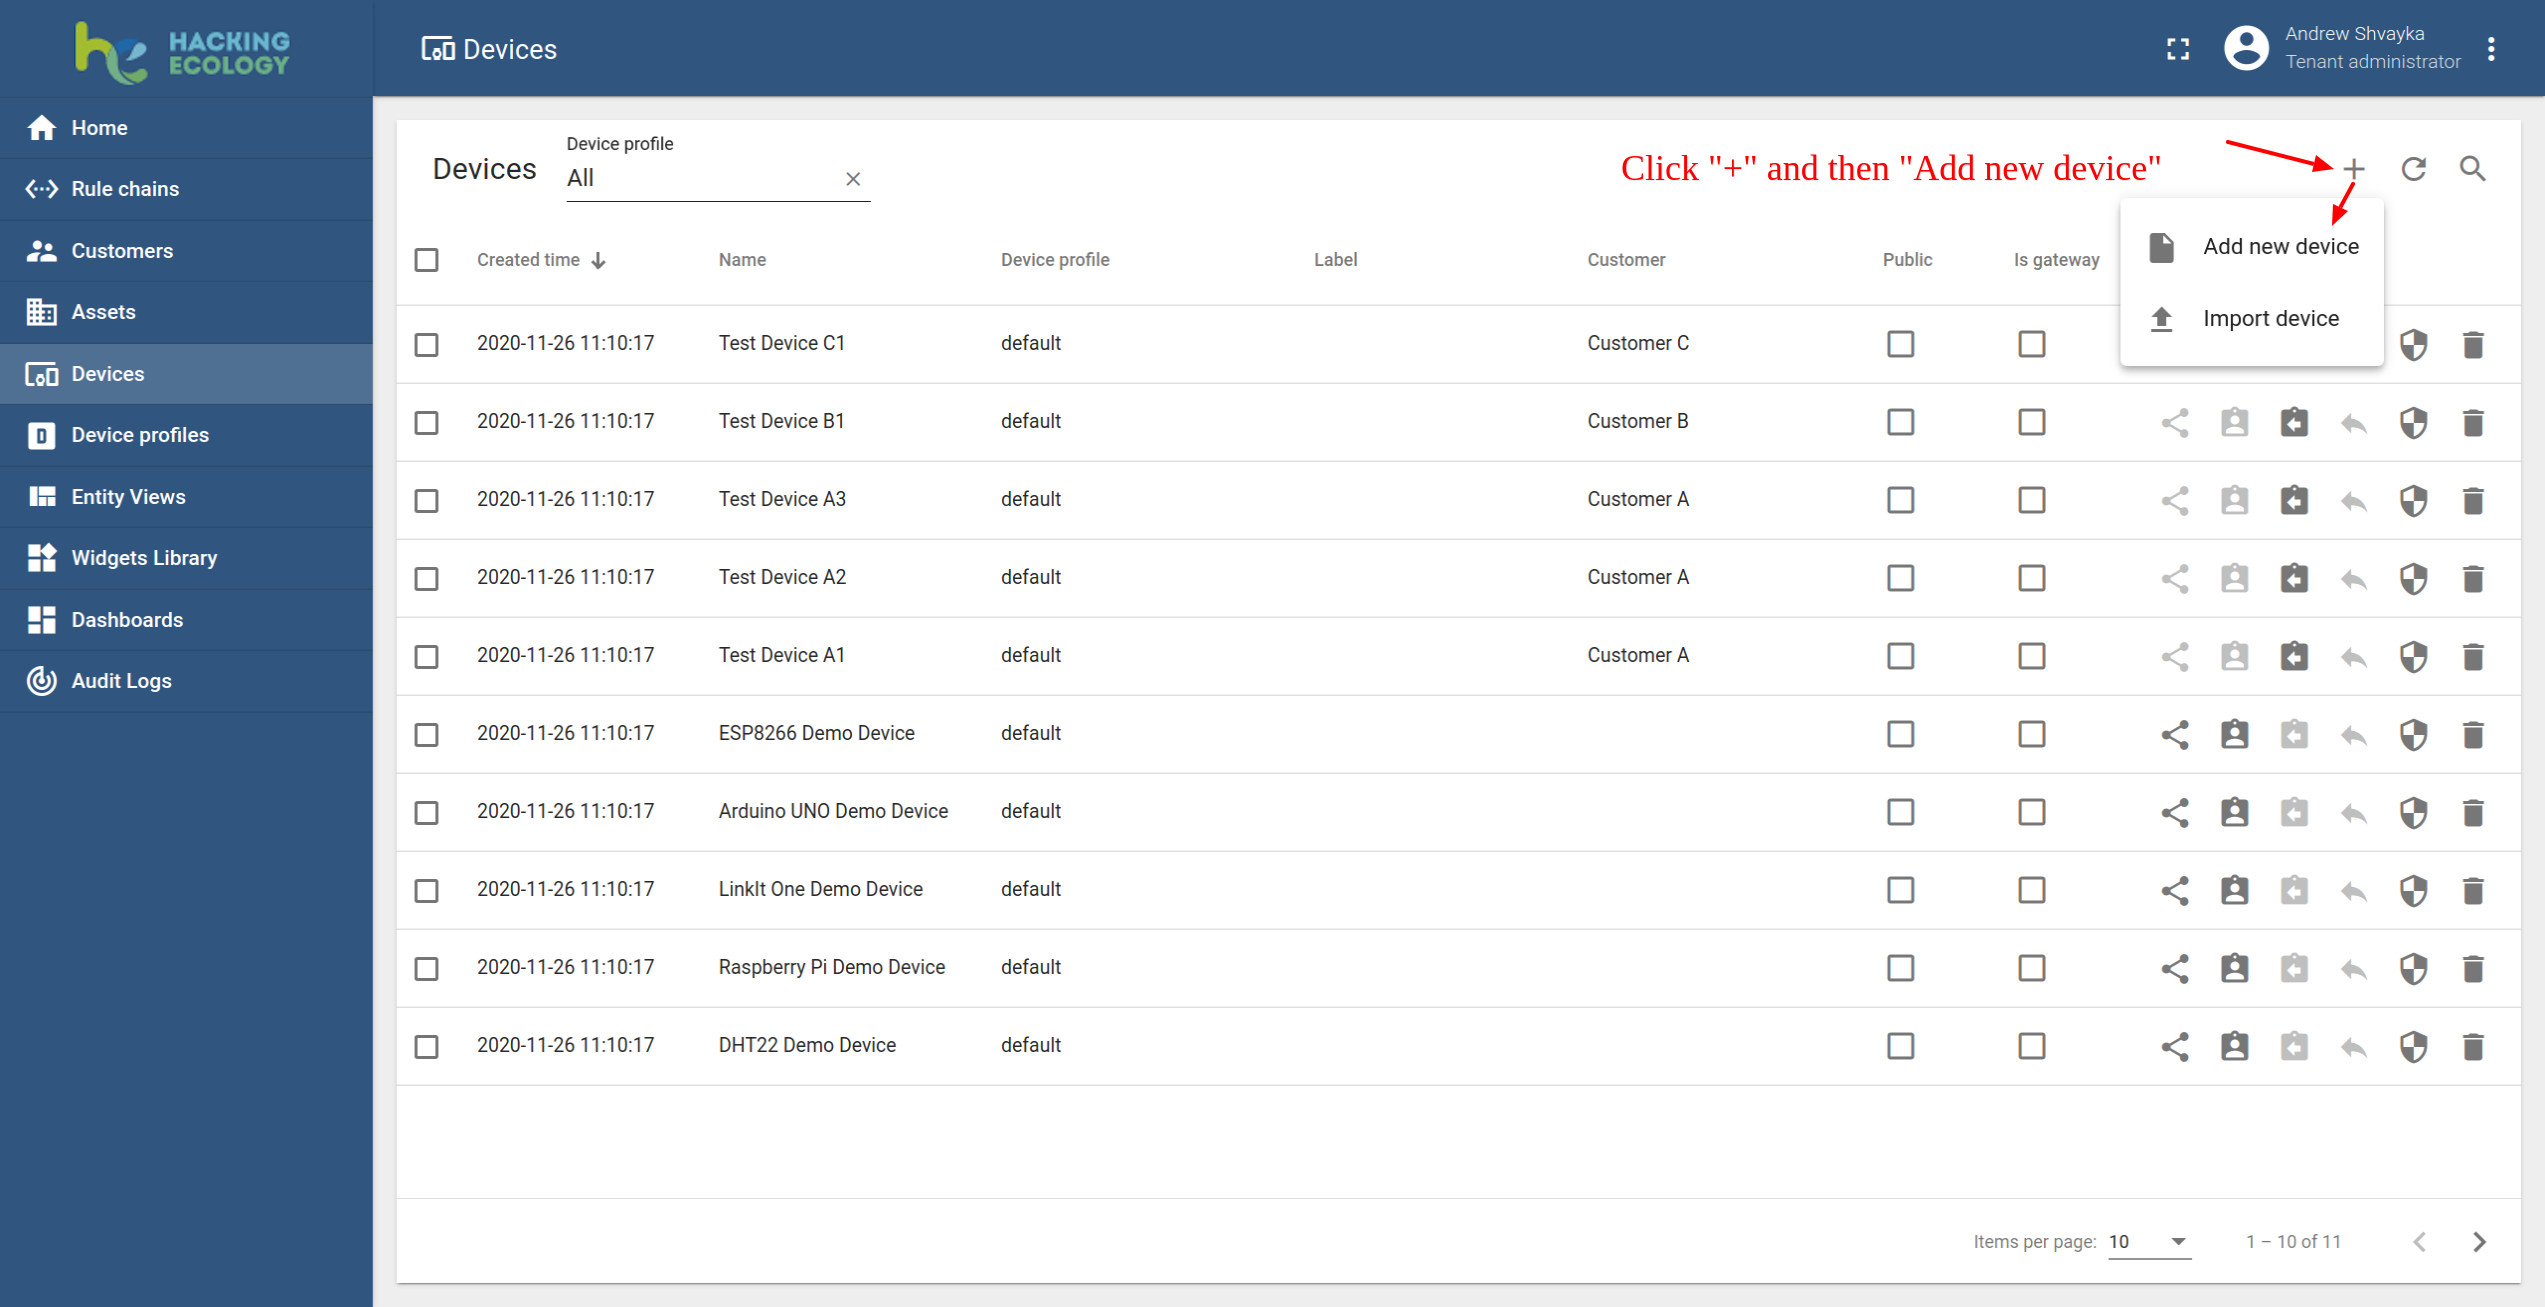
- Click on the “+” icon in the upper right corner of the table and select “Add New Device”.
-
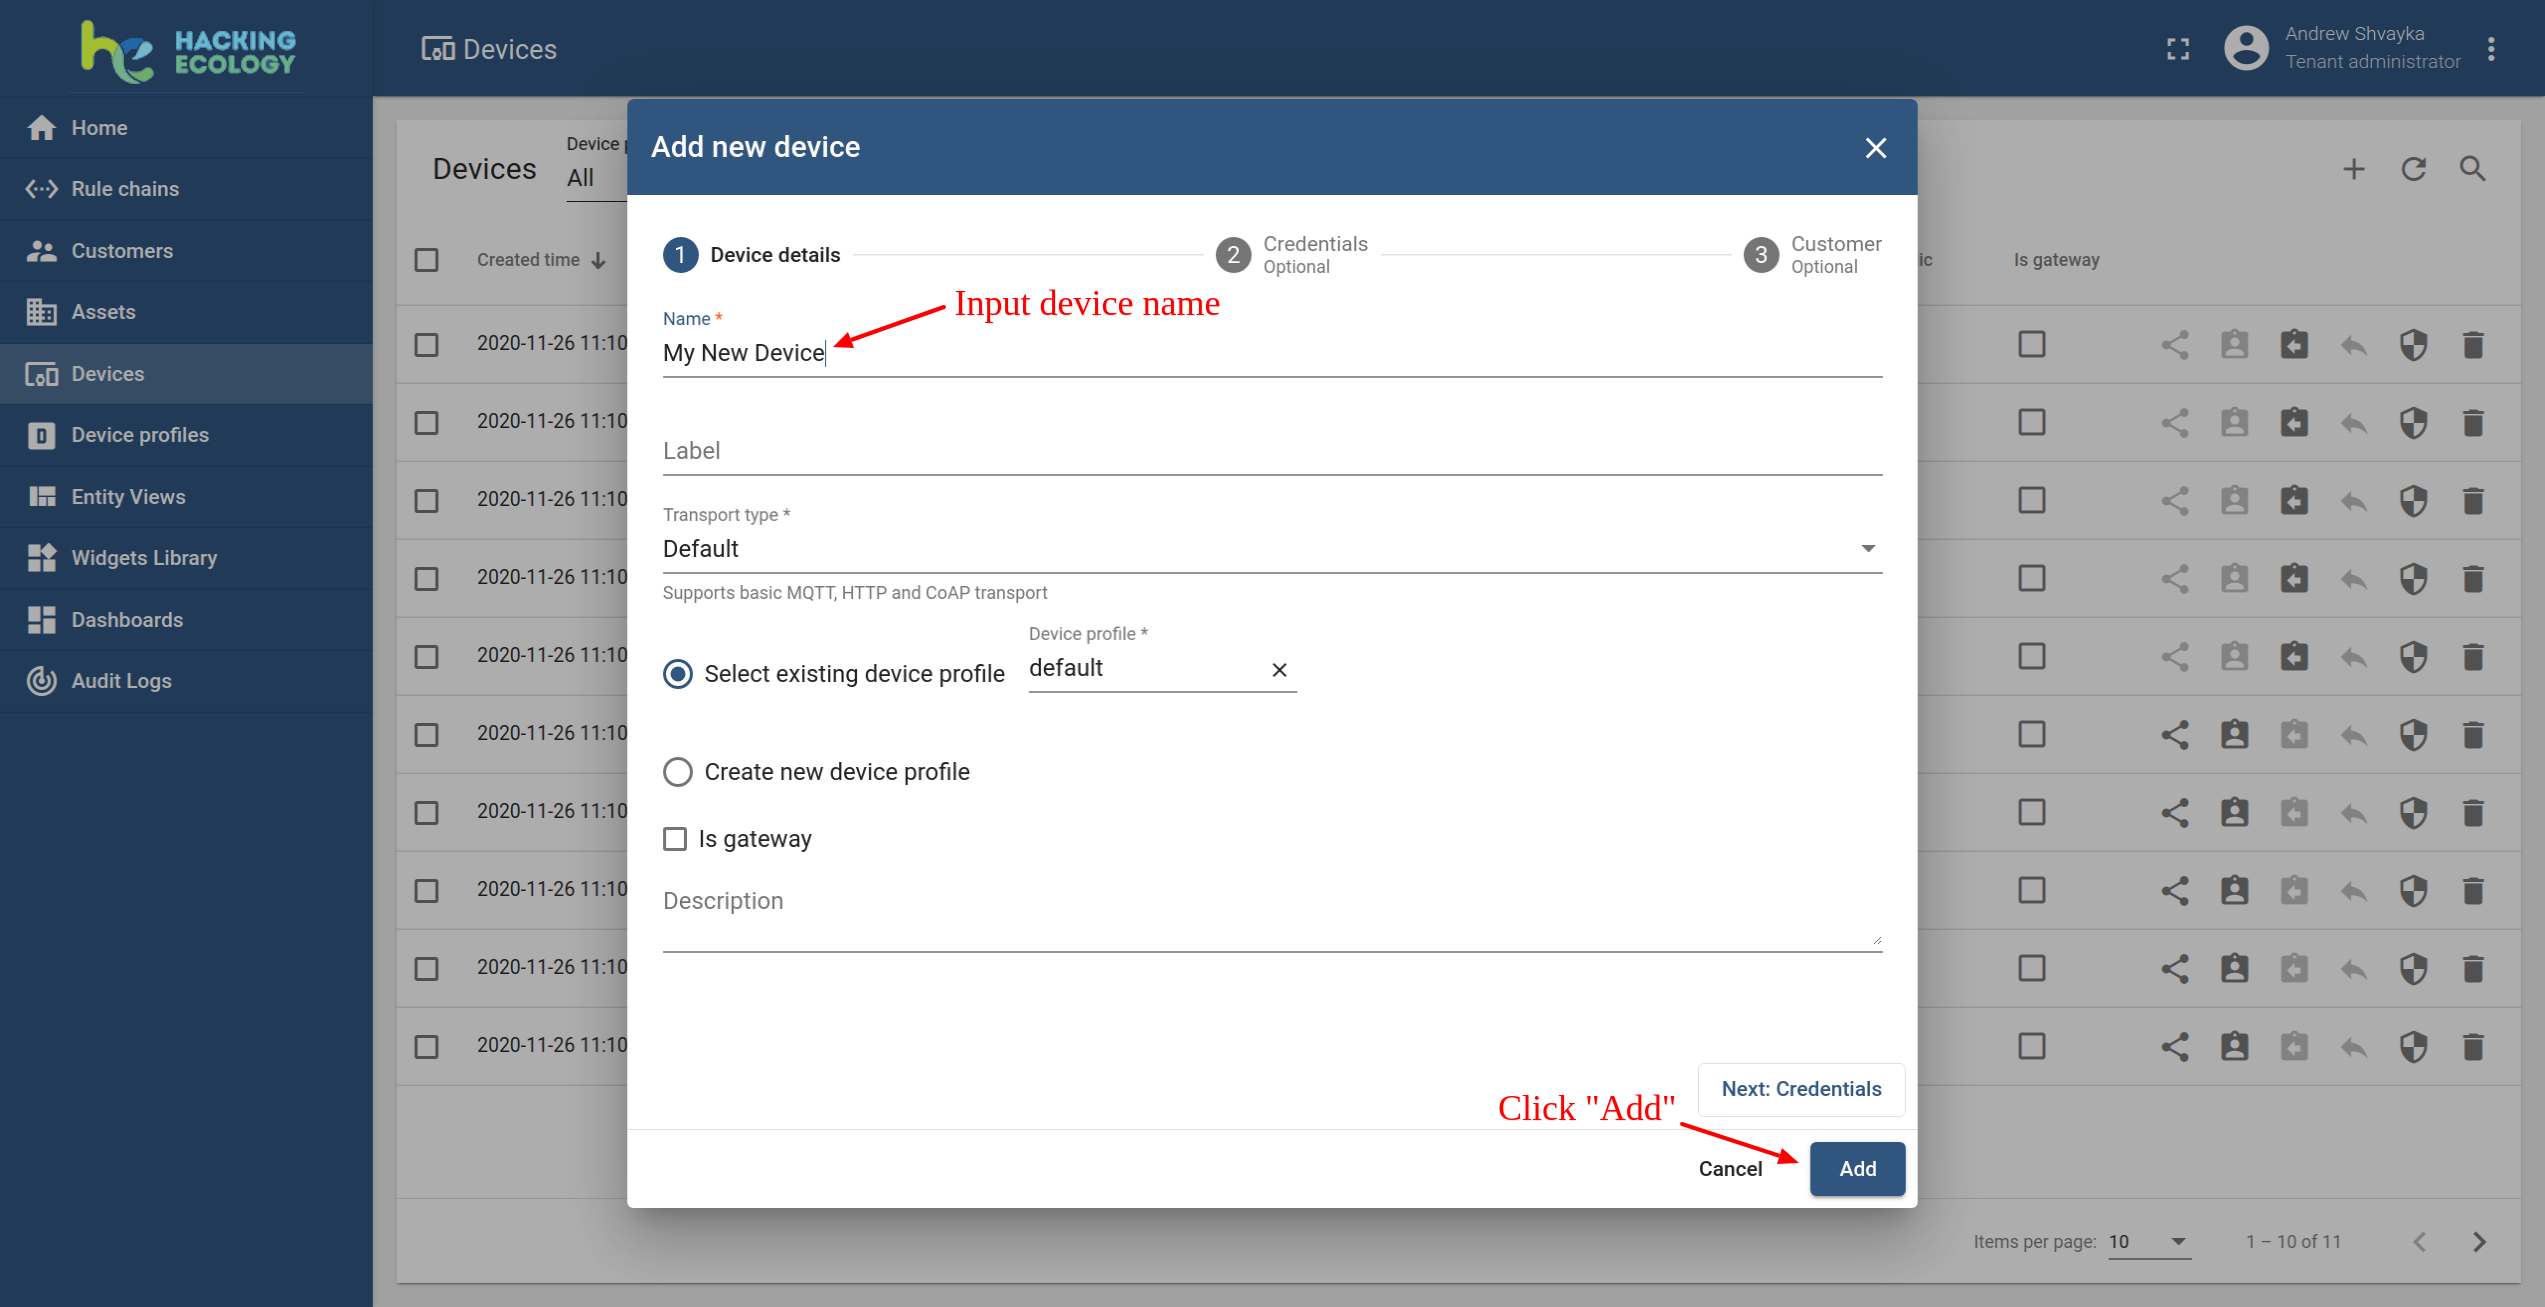
Give a name to the device and click “Add” to add it.
-
Device will be listed first, as the table sorts devices by creation date.
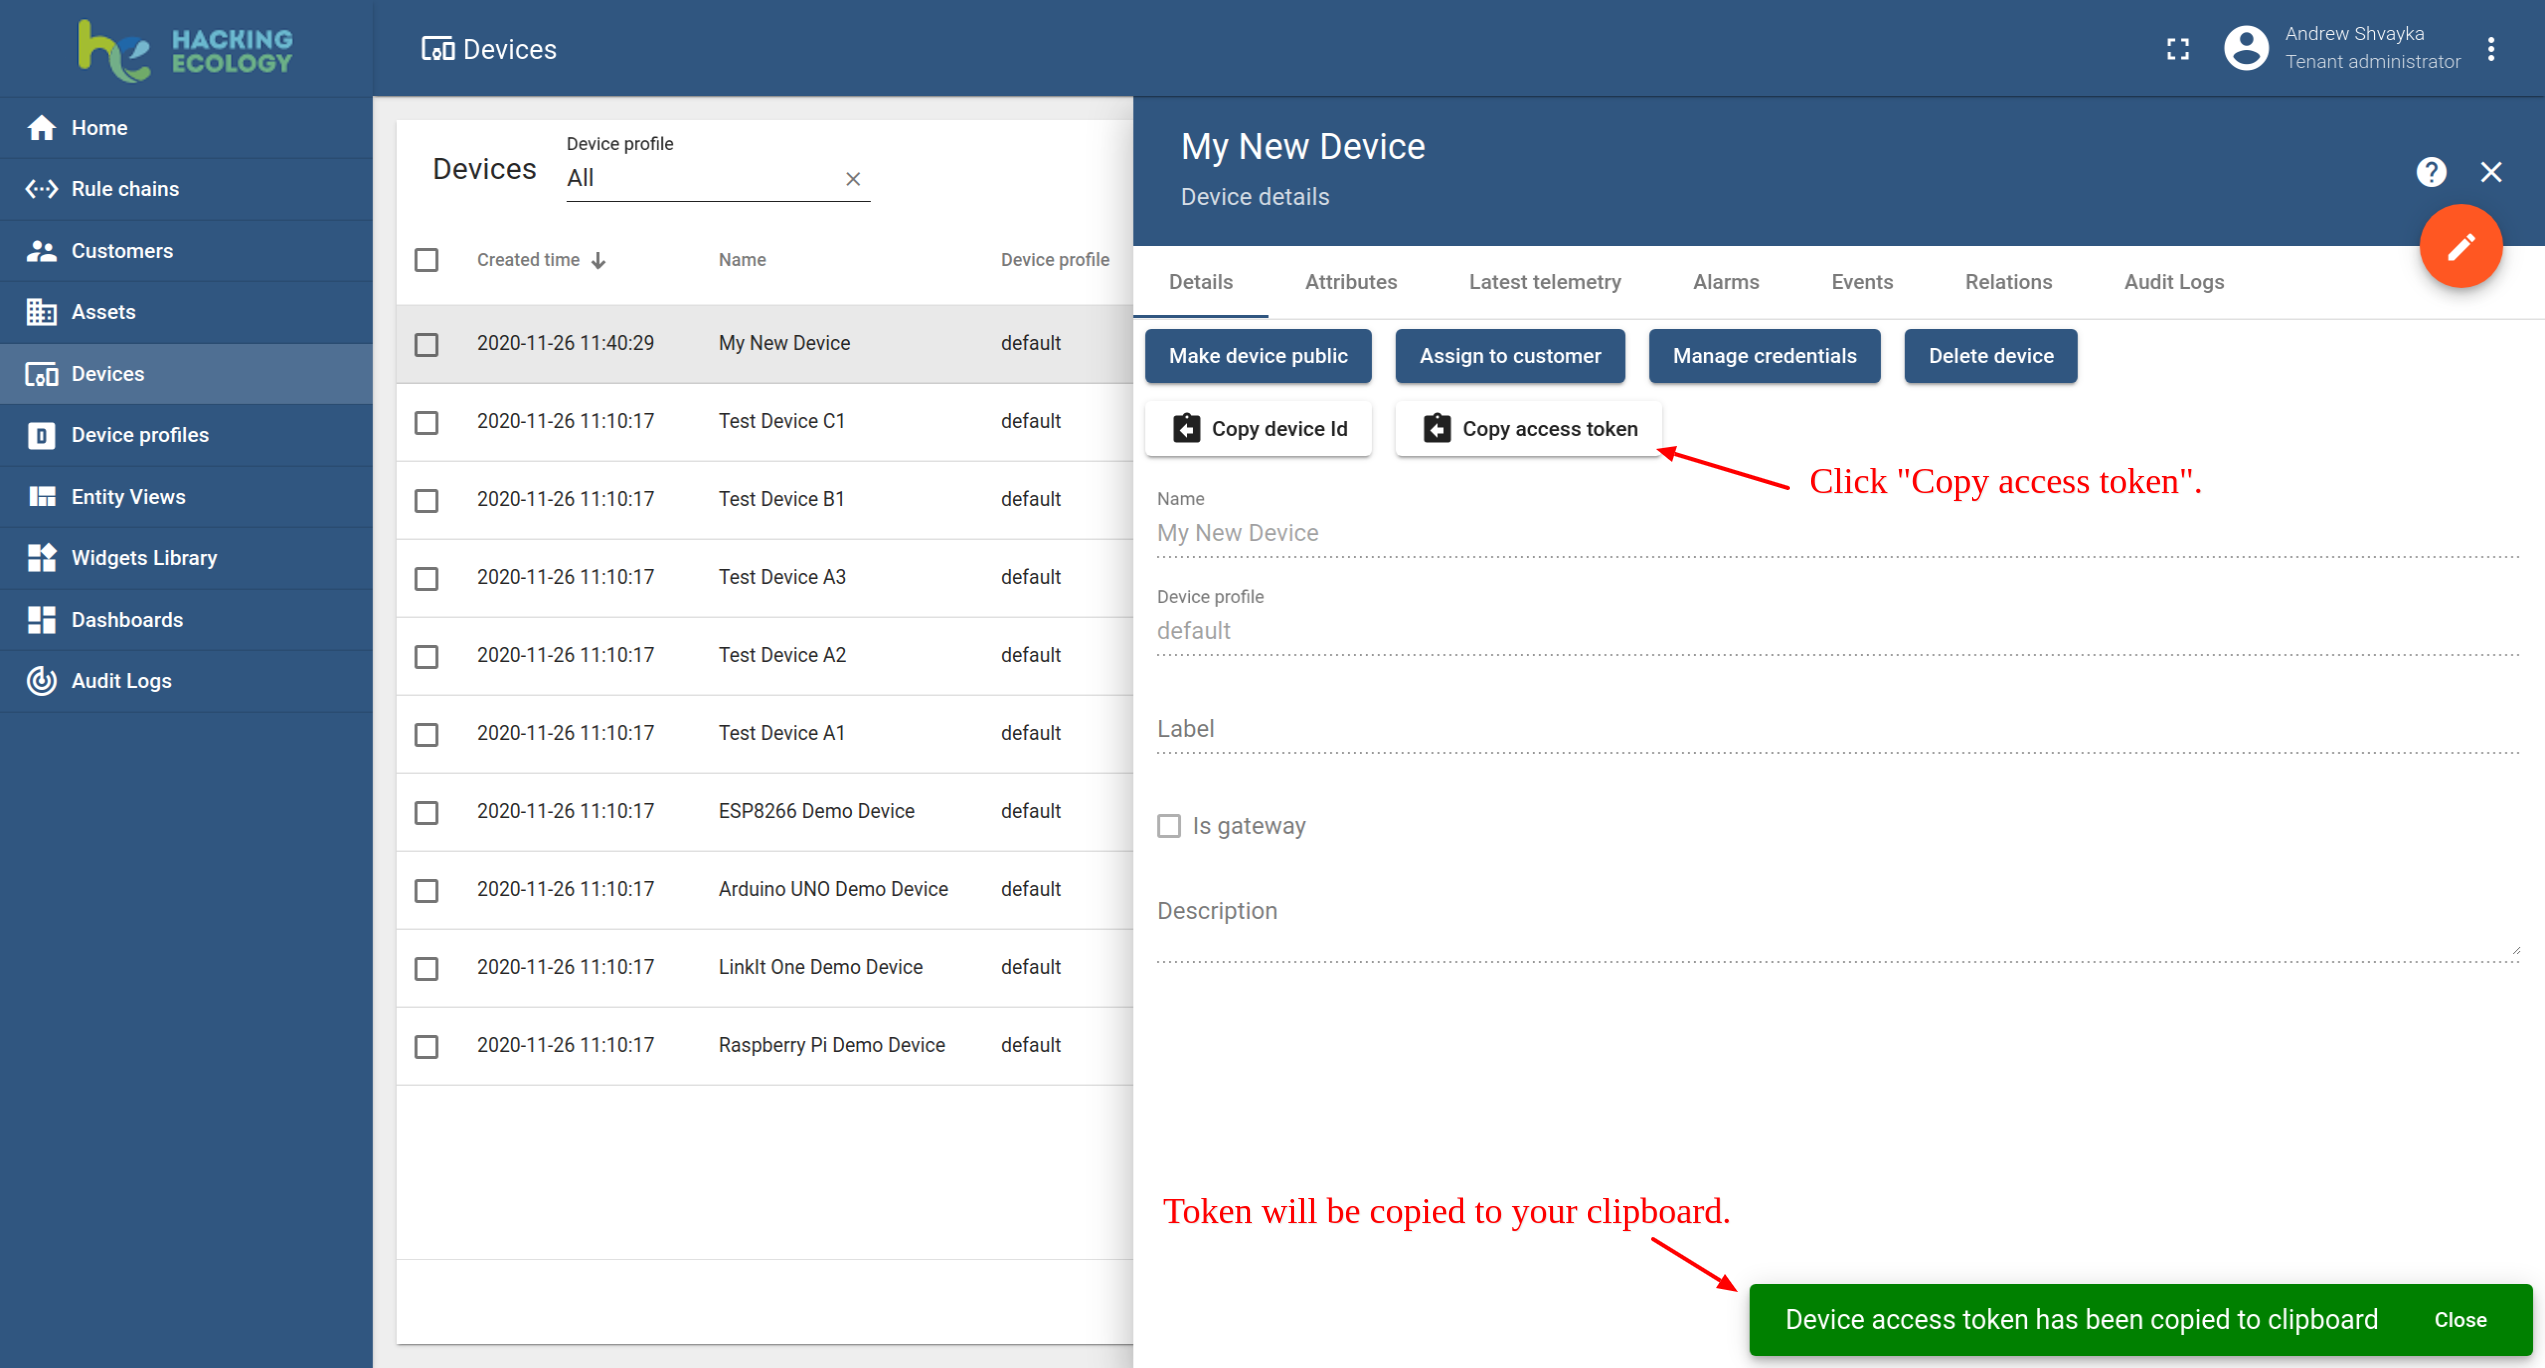
Connecting Nayad
To connect Nayad, you have to use its credentials. The Sensing platform supports multiple device credentials. We recommend using automatically generated credentials, which is the access token for this guide. But the Token can be changed, when the identification by specific name is really necessary.
-
Select the device: Click on its row in the table to open the details.
-
Click on “Copy Access Token” and store it in a safe place. You’re going to use it when setting up Nayad firmware.
-
Go to Nayad Firmware and edit the
TOKEN_IDwith the Access Token from your device :
#define TOKEN "TOKEN_ID"
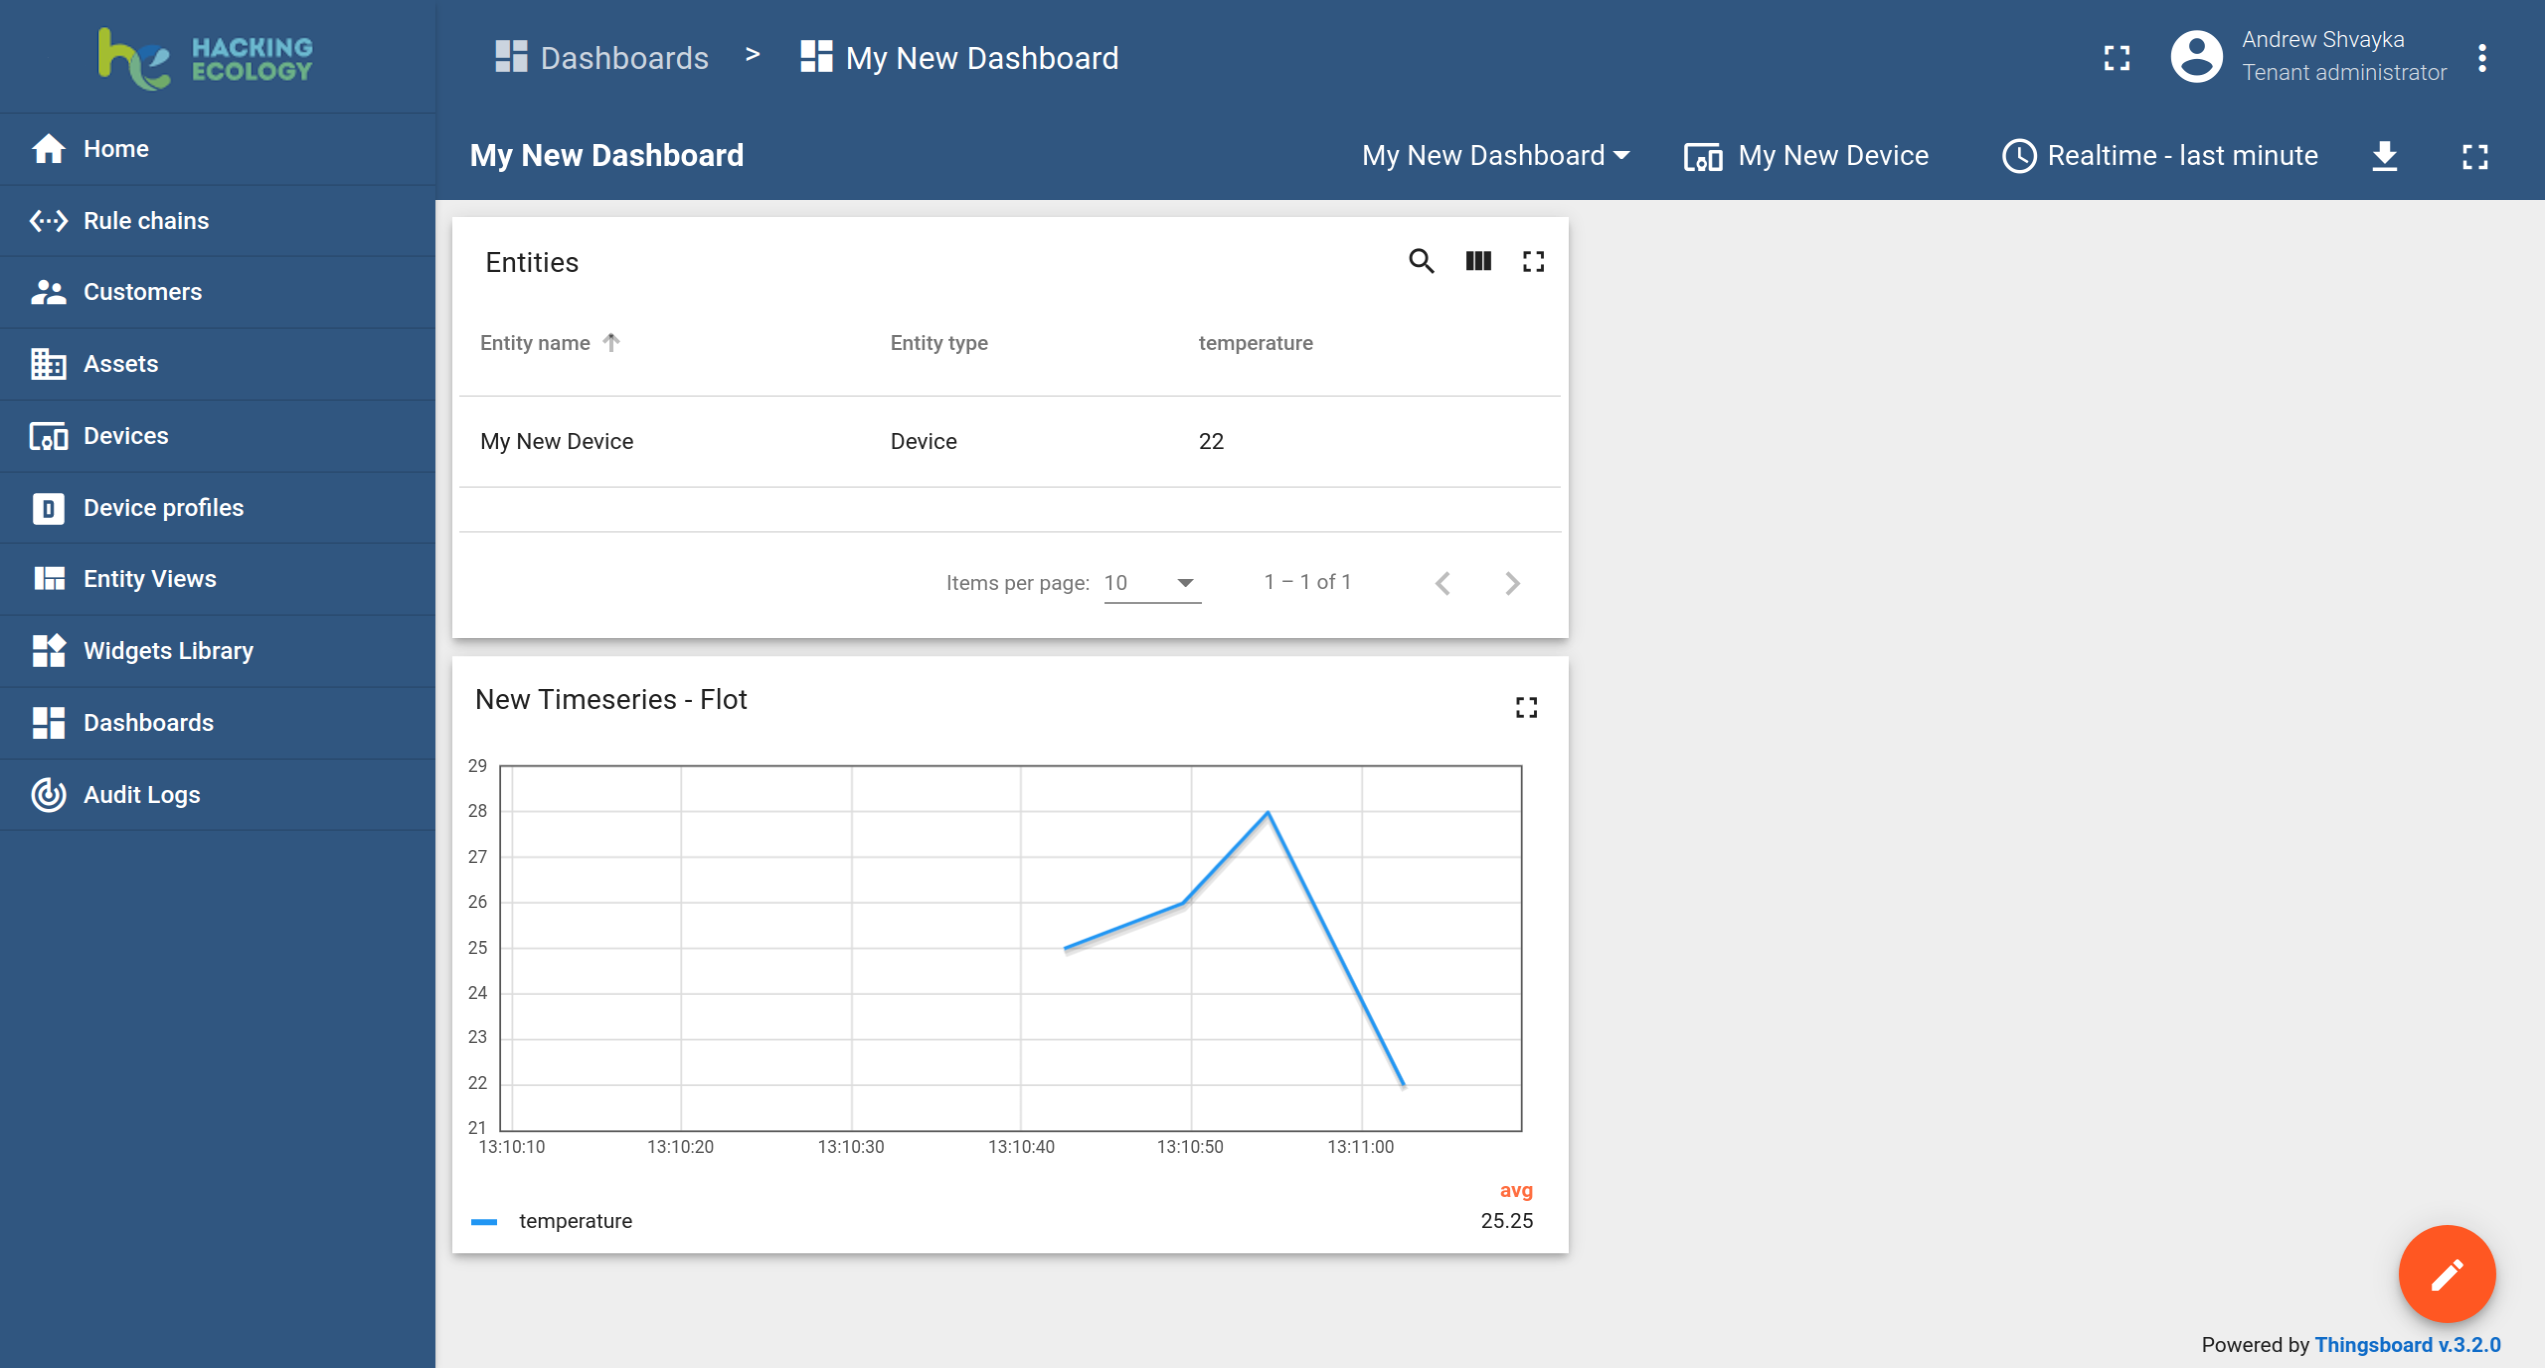
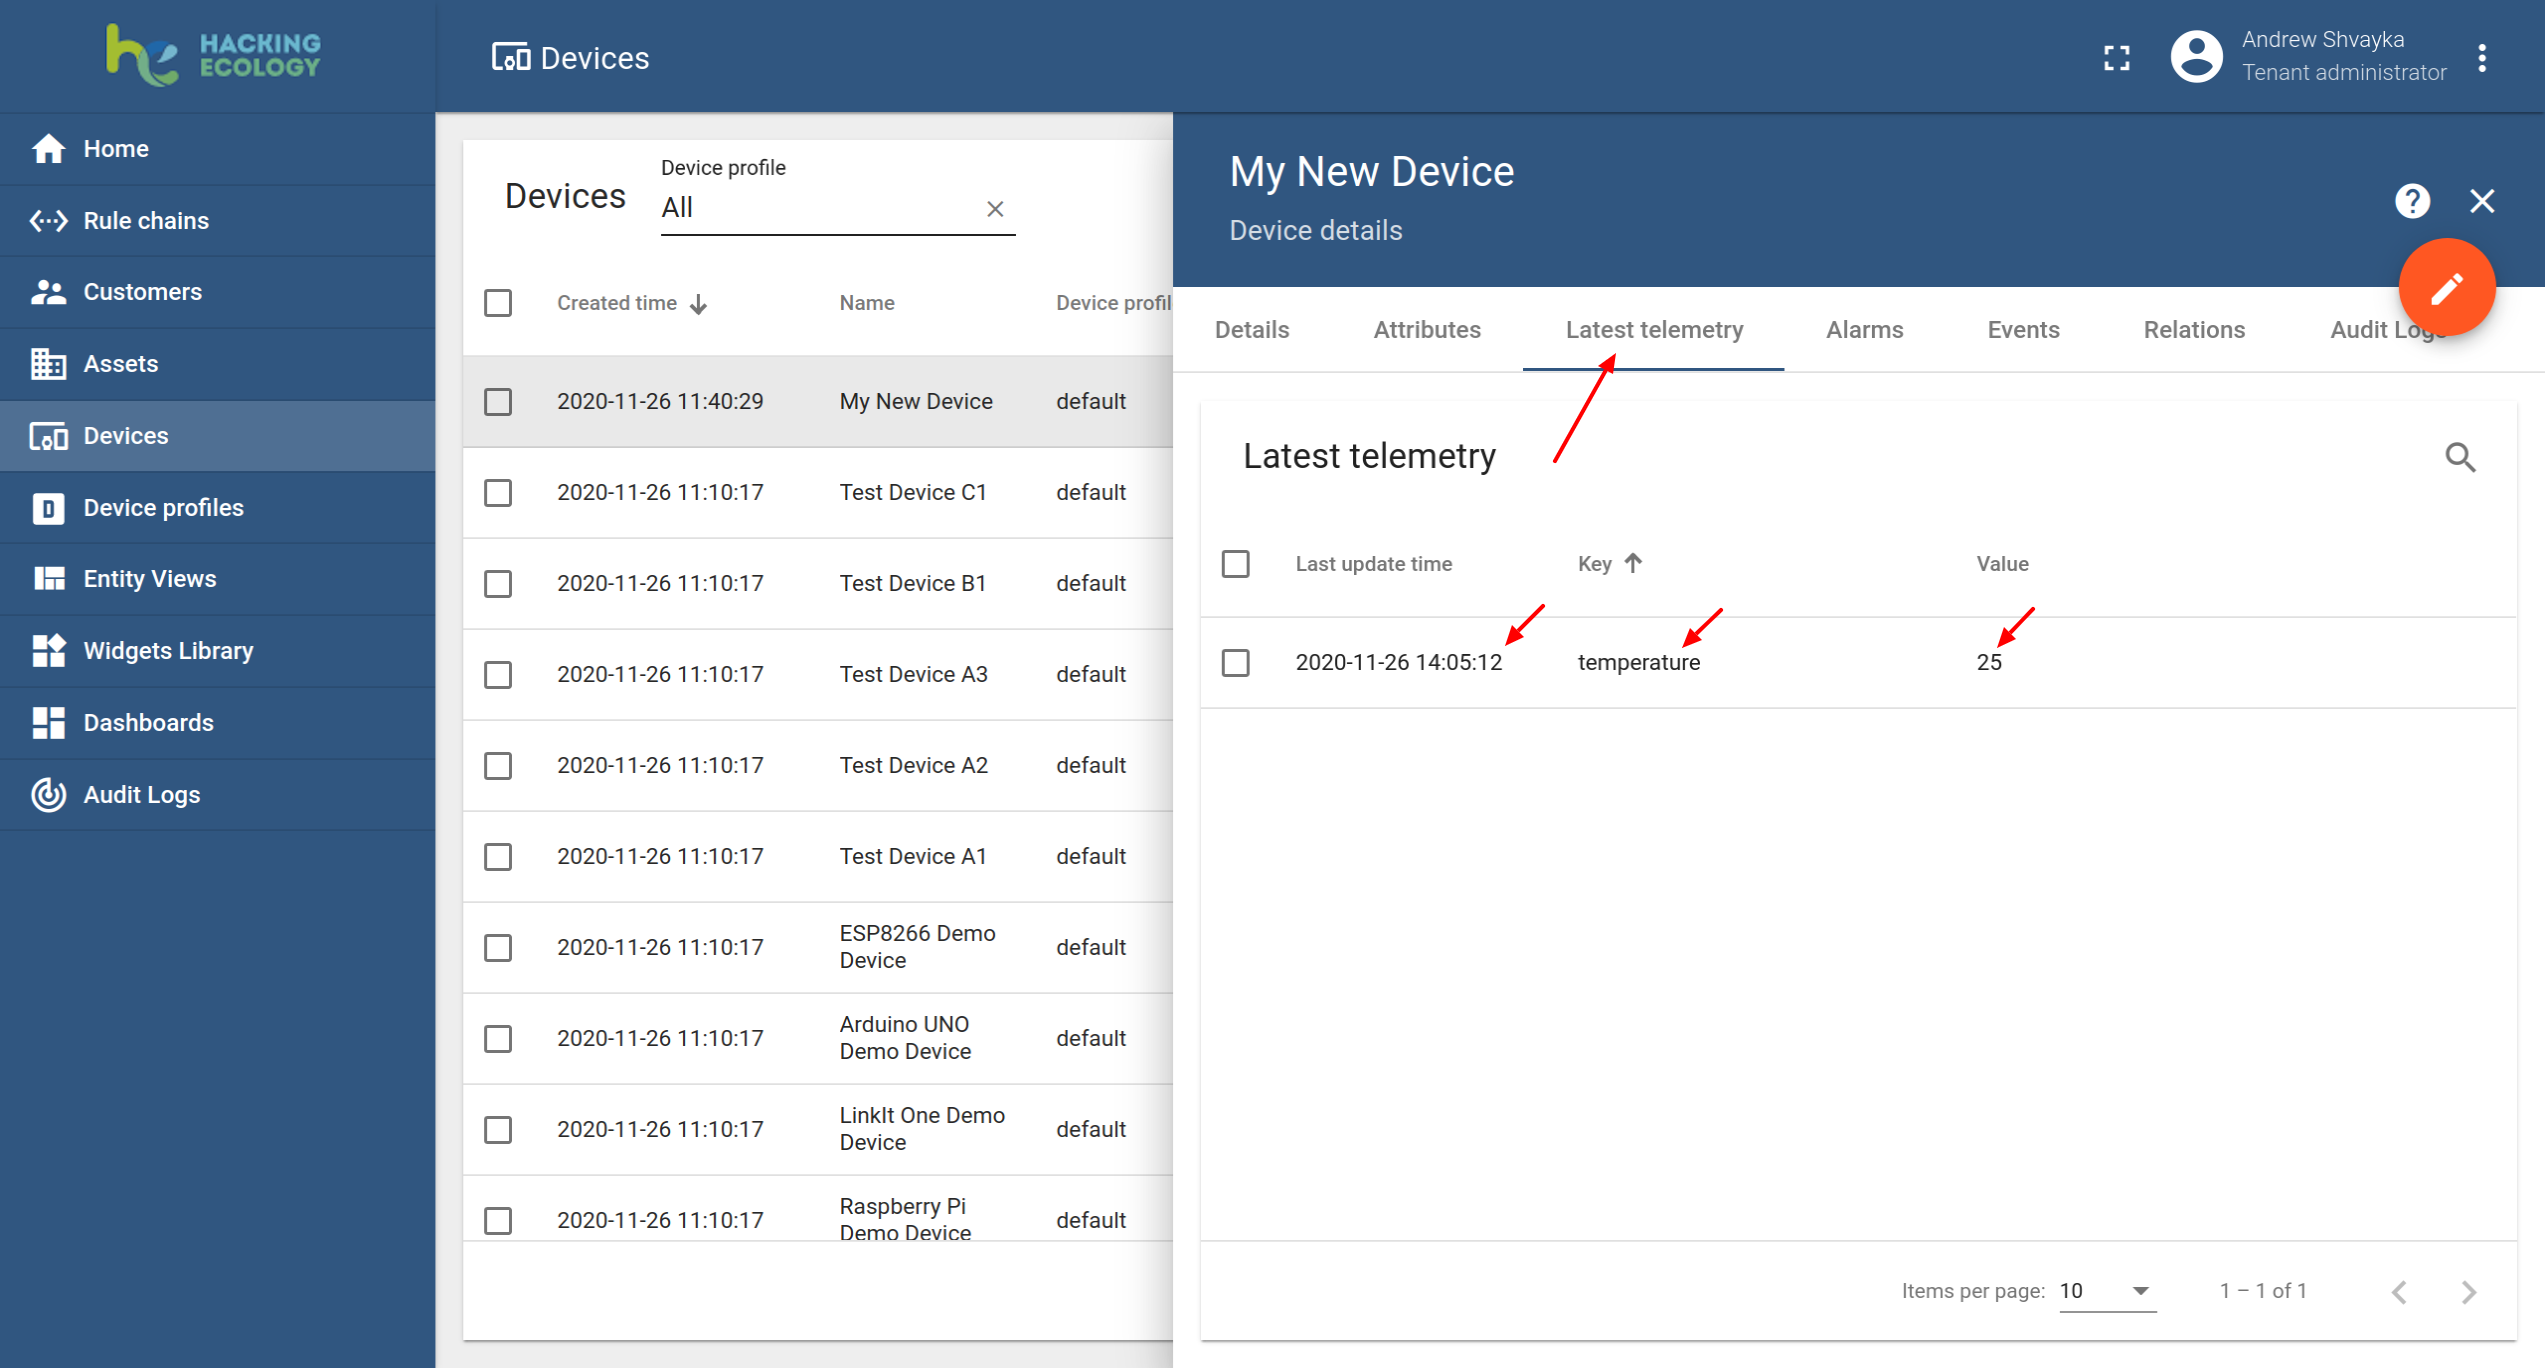
After successfully publishing the data readings, you will be able to see them in the Telemetry tab of your device:
-
Click on the row in the table to open the device details.
-
Navigate to the Telemetry tab.
#3. Dashboard Configuration
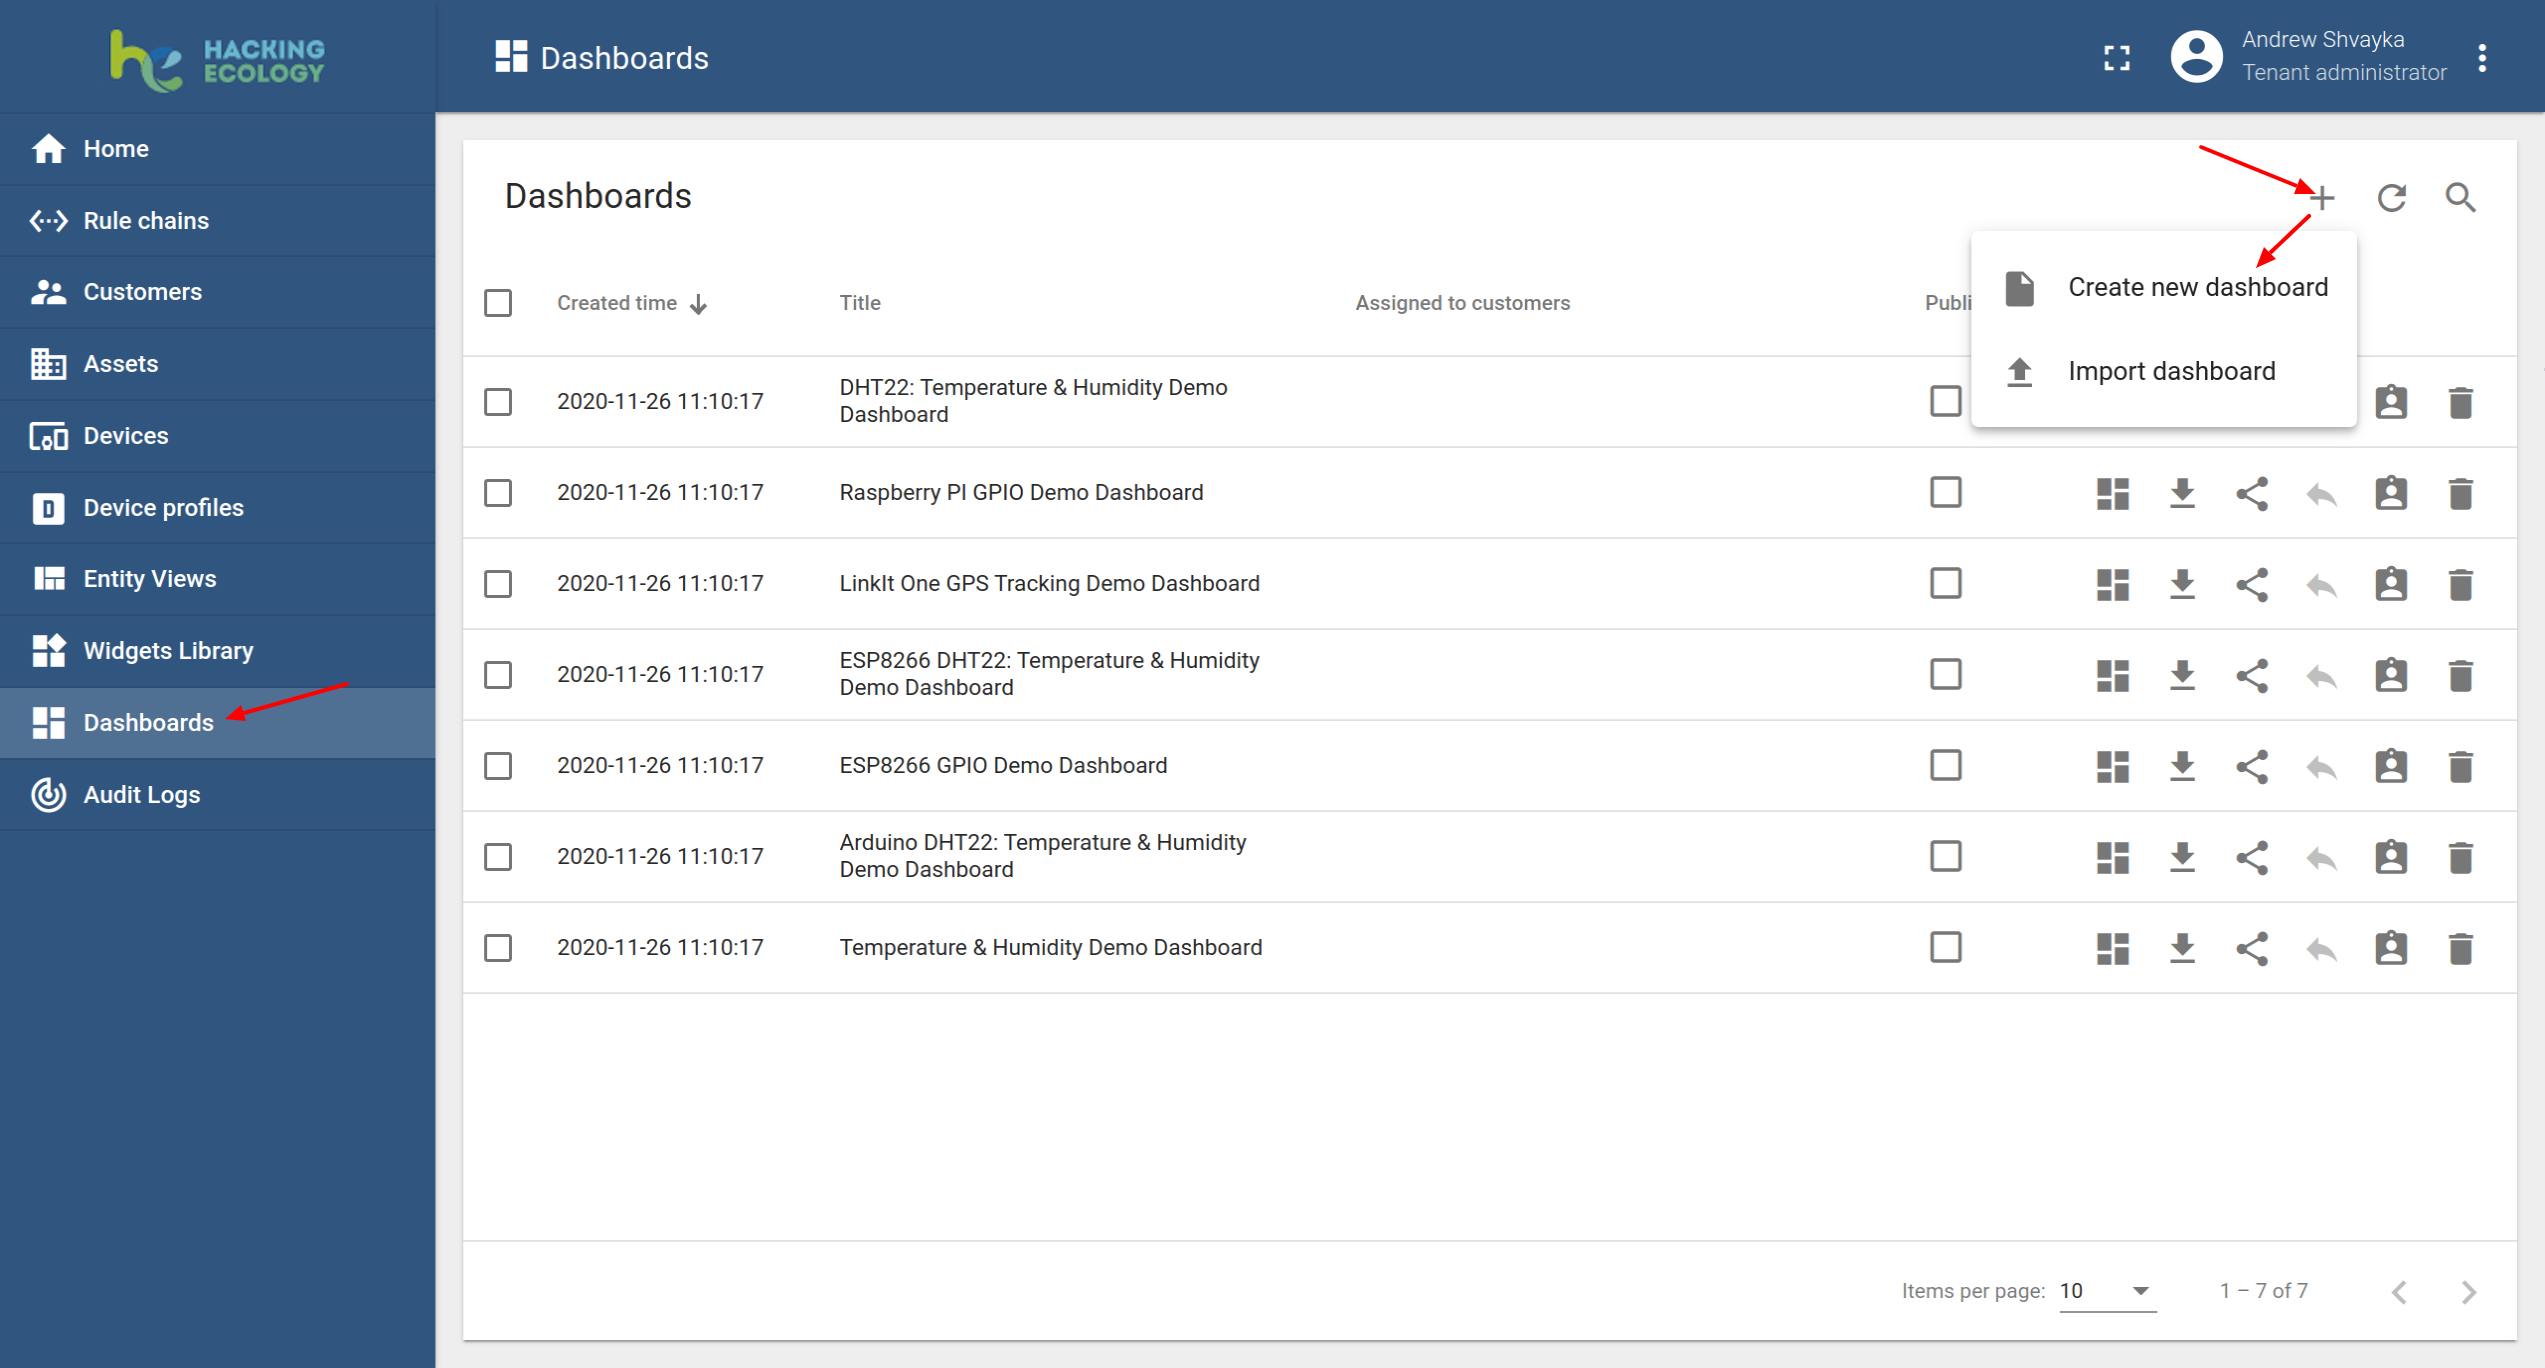
Create Dashboard
Once you confirm the telemetry data, let’s create the dashboard to visualize the data.
-
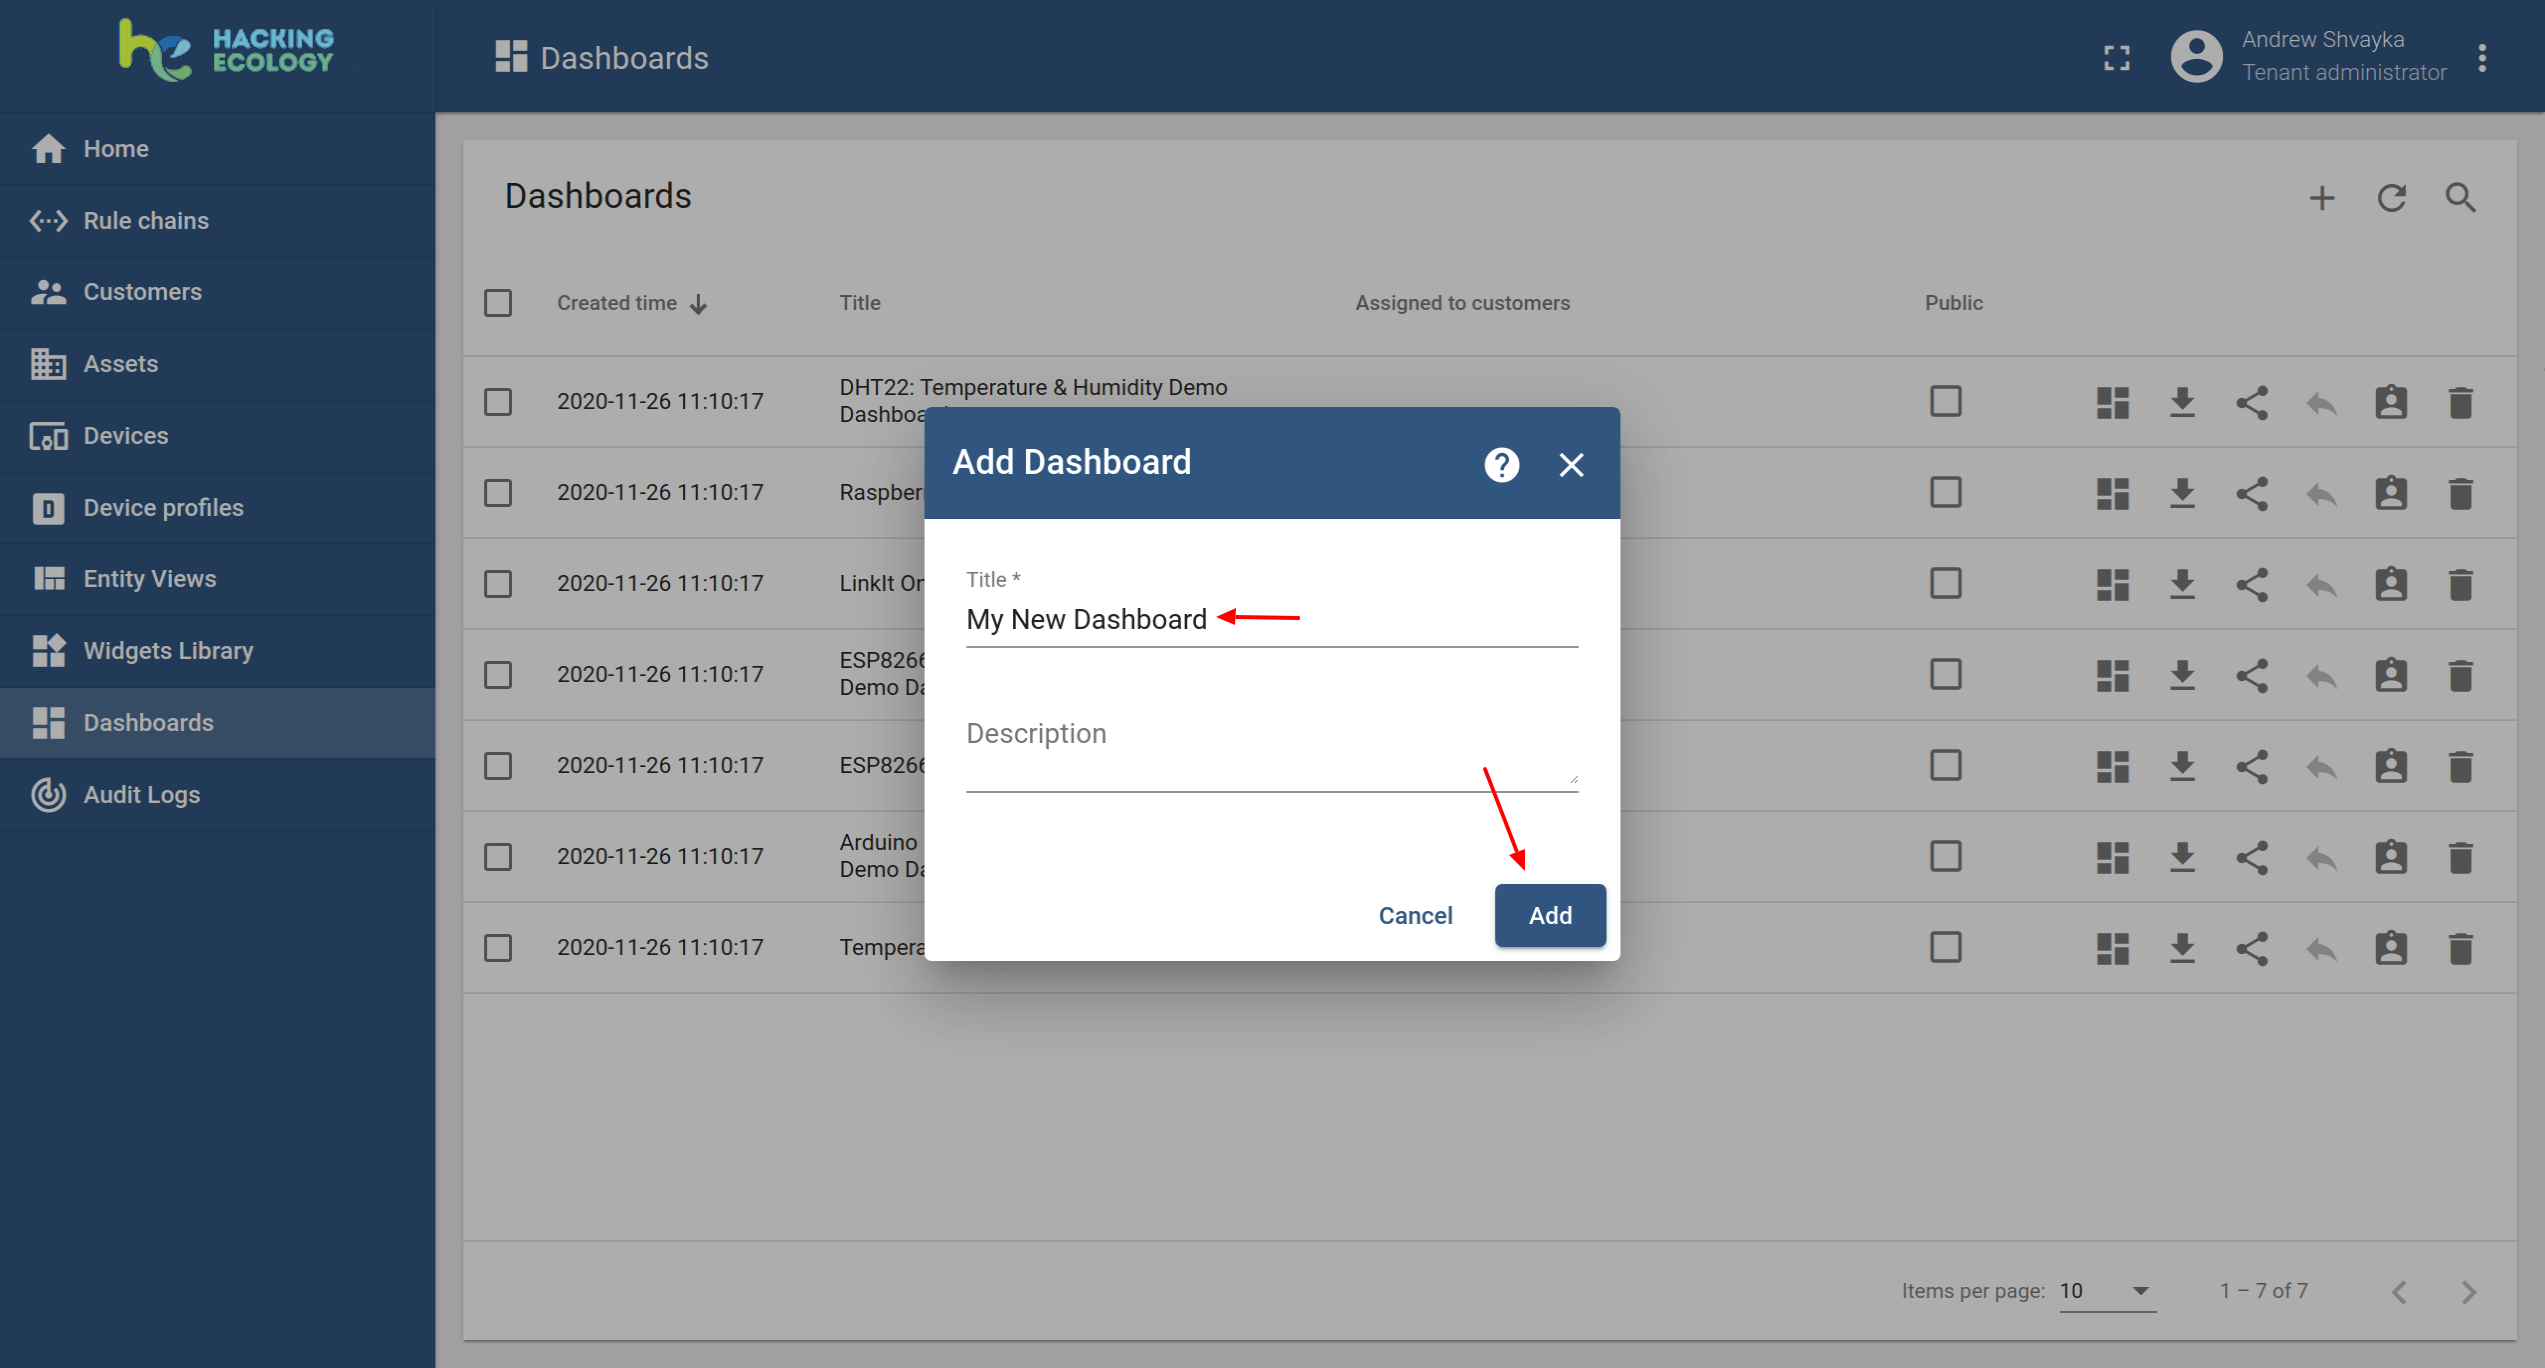
Open the Dashboard page. Click on the “+” icon in the upper right corner. Select “Create New Dashboard”.
-
Complete the input Dashboard name. Click “Add” to add the panel.
-
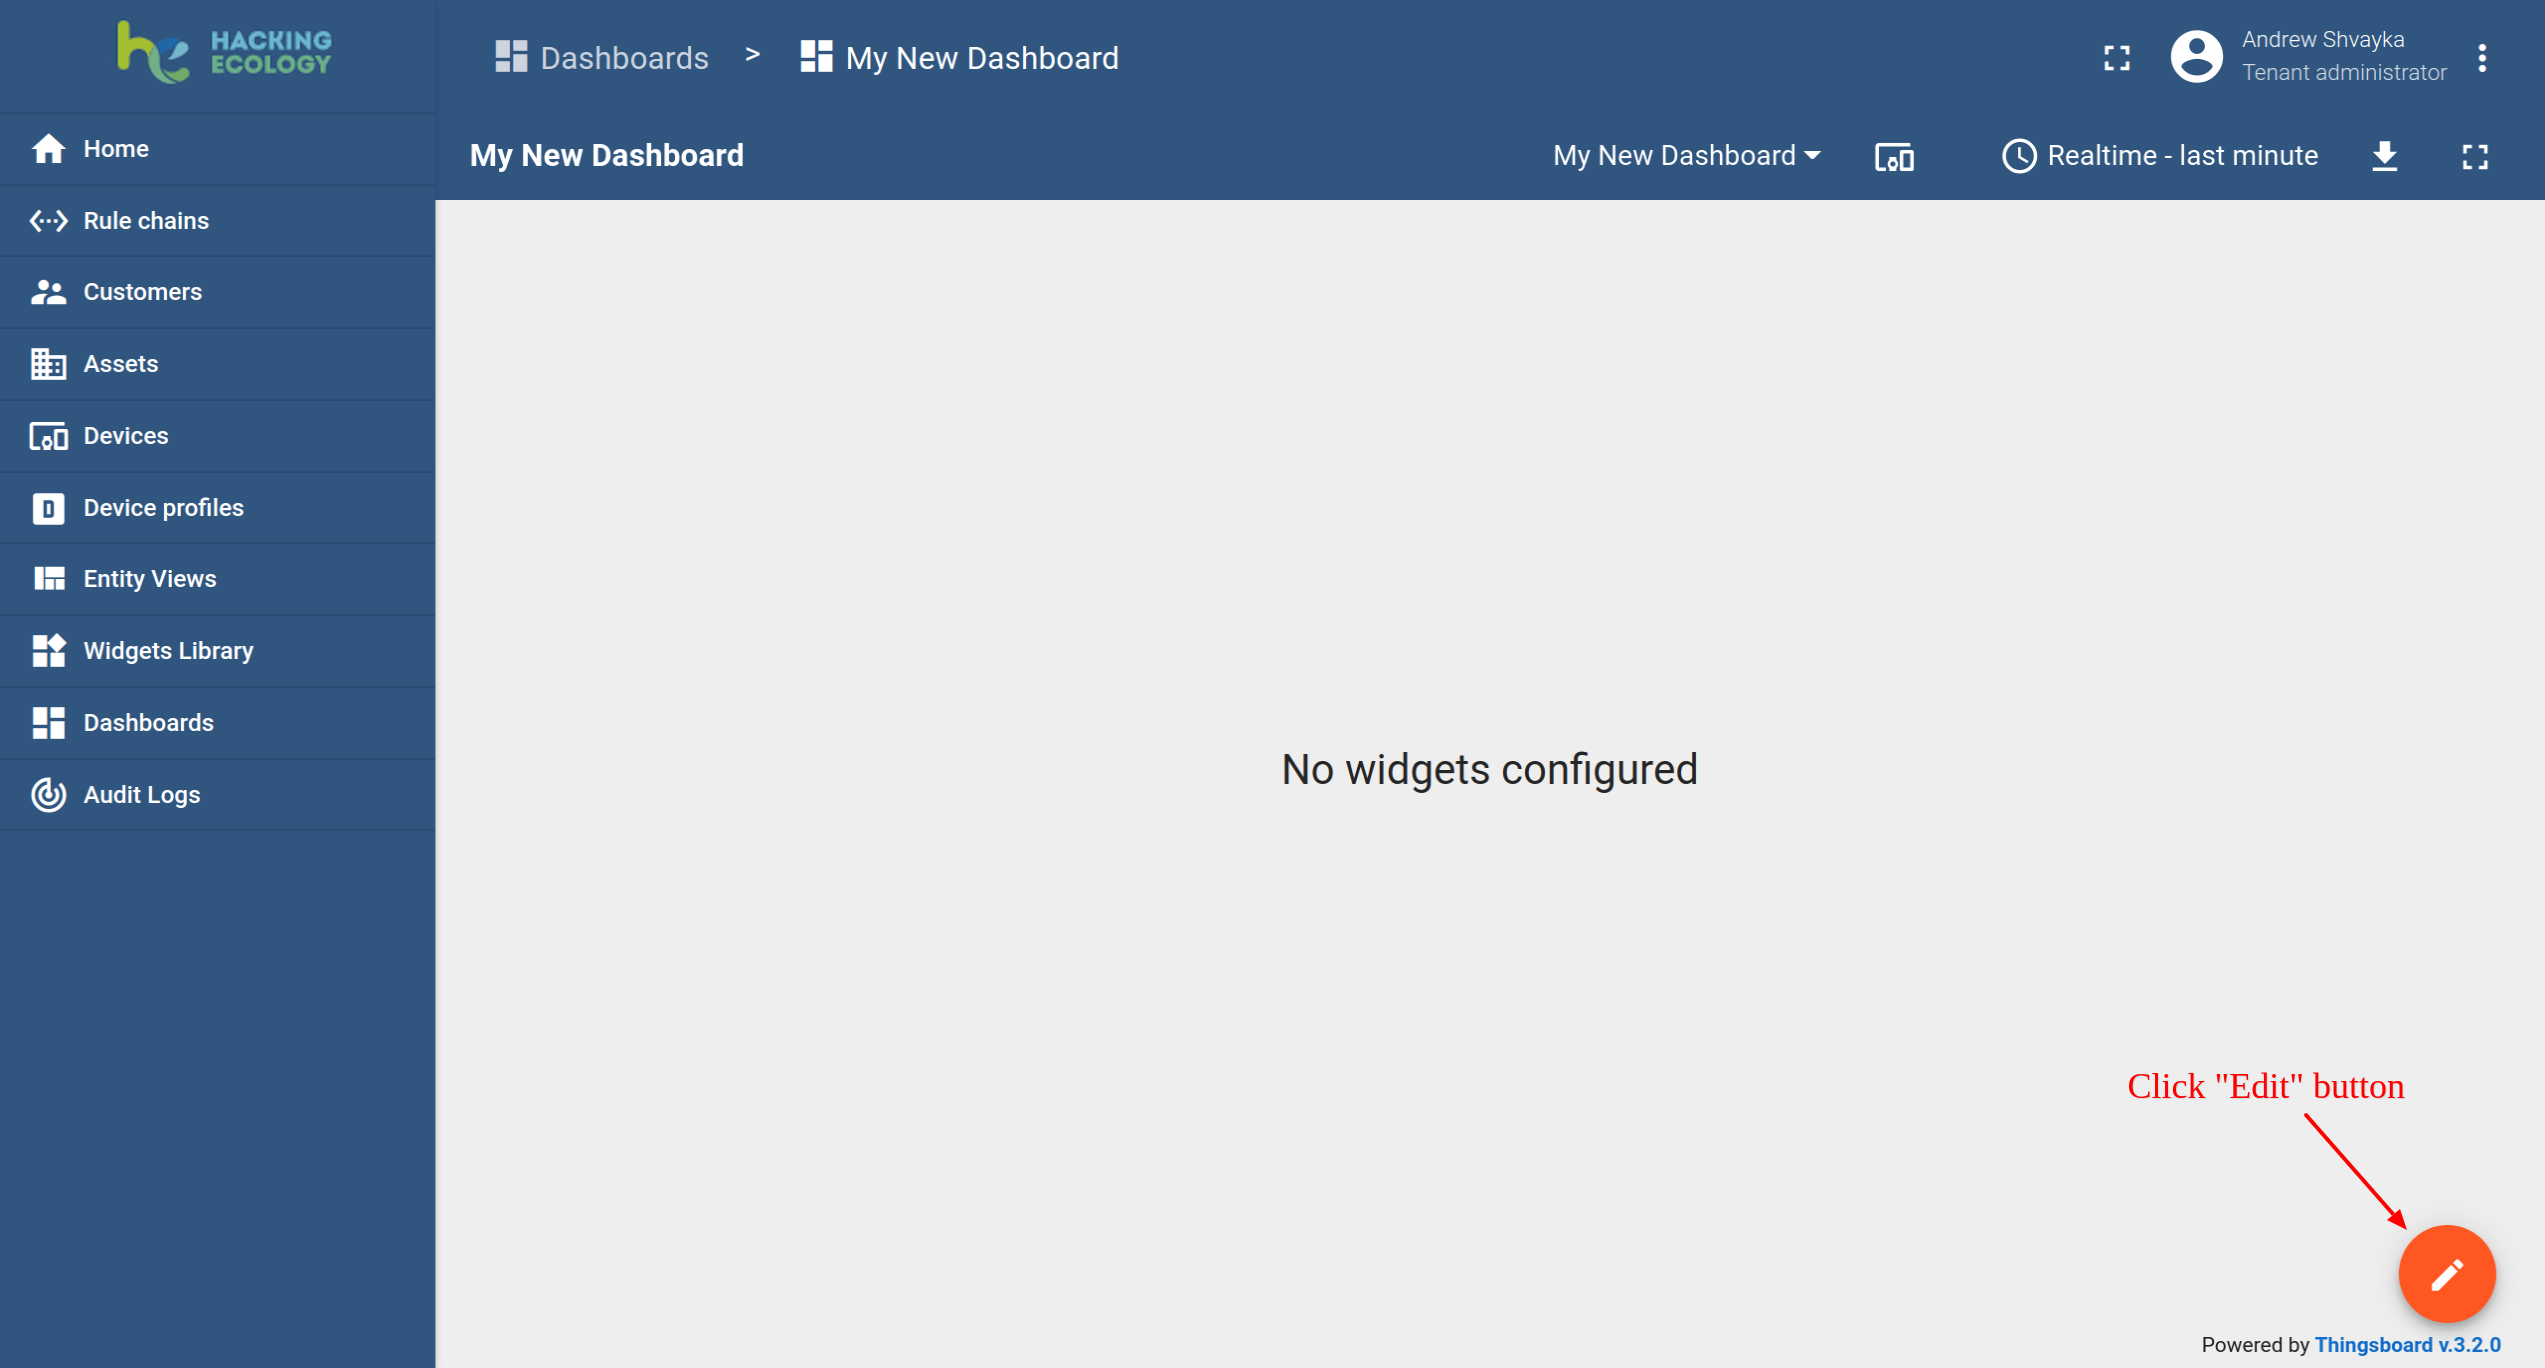
Now you should see your dashboard.
-
Click on the “Open Dashboard” icon.
Remember that the table sorts dashboards by time of the creation, so the new dashboard will be listed first.
Setting Nayad to be used in te widgets (Creating Alias and Widgets)
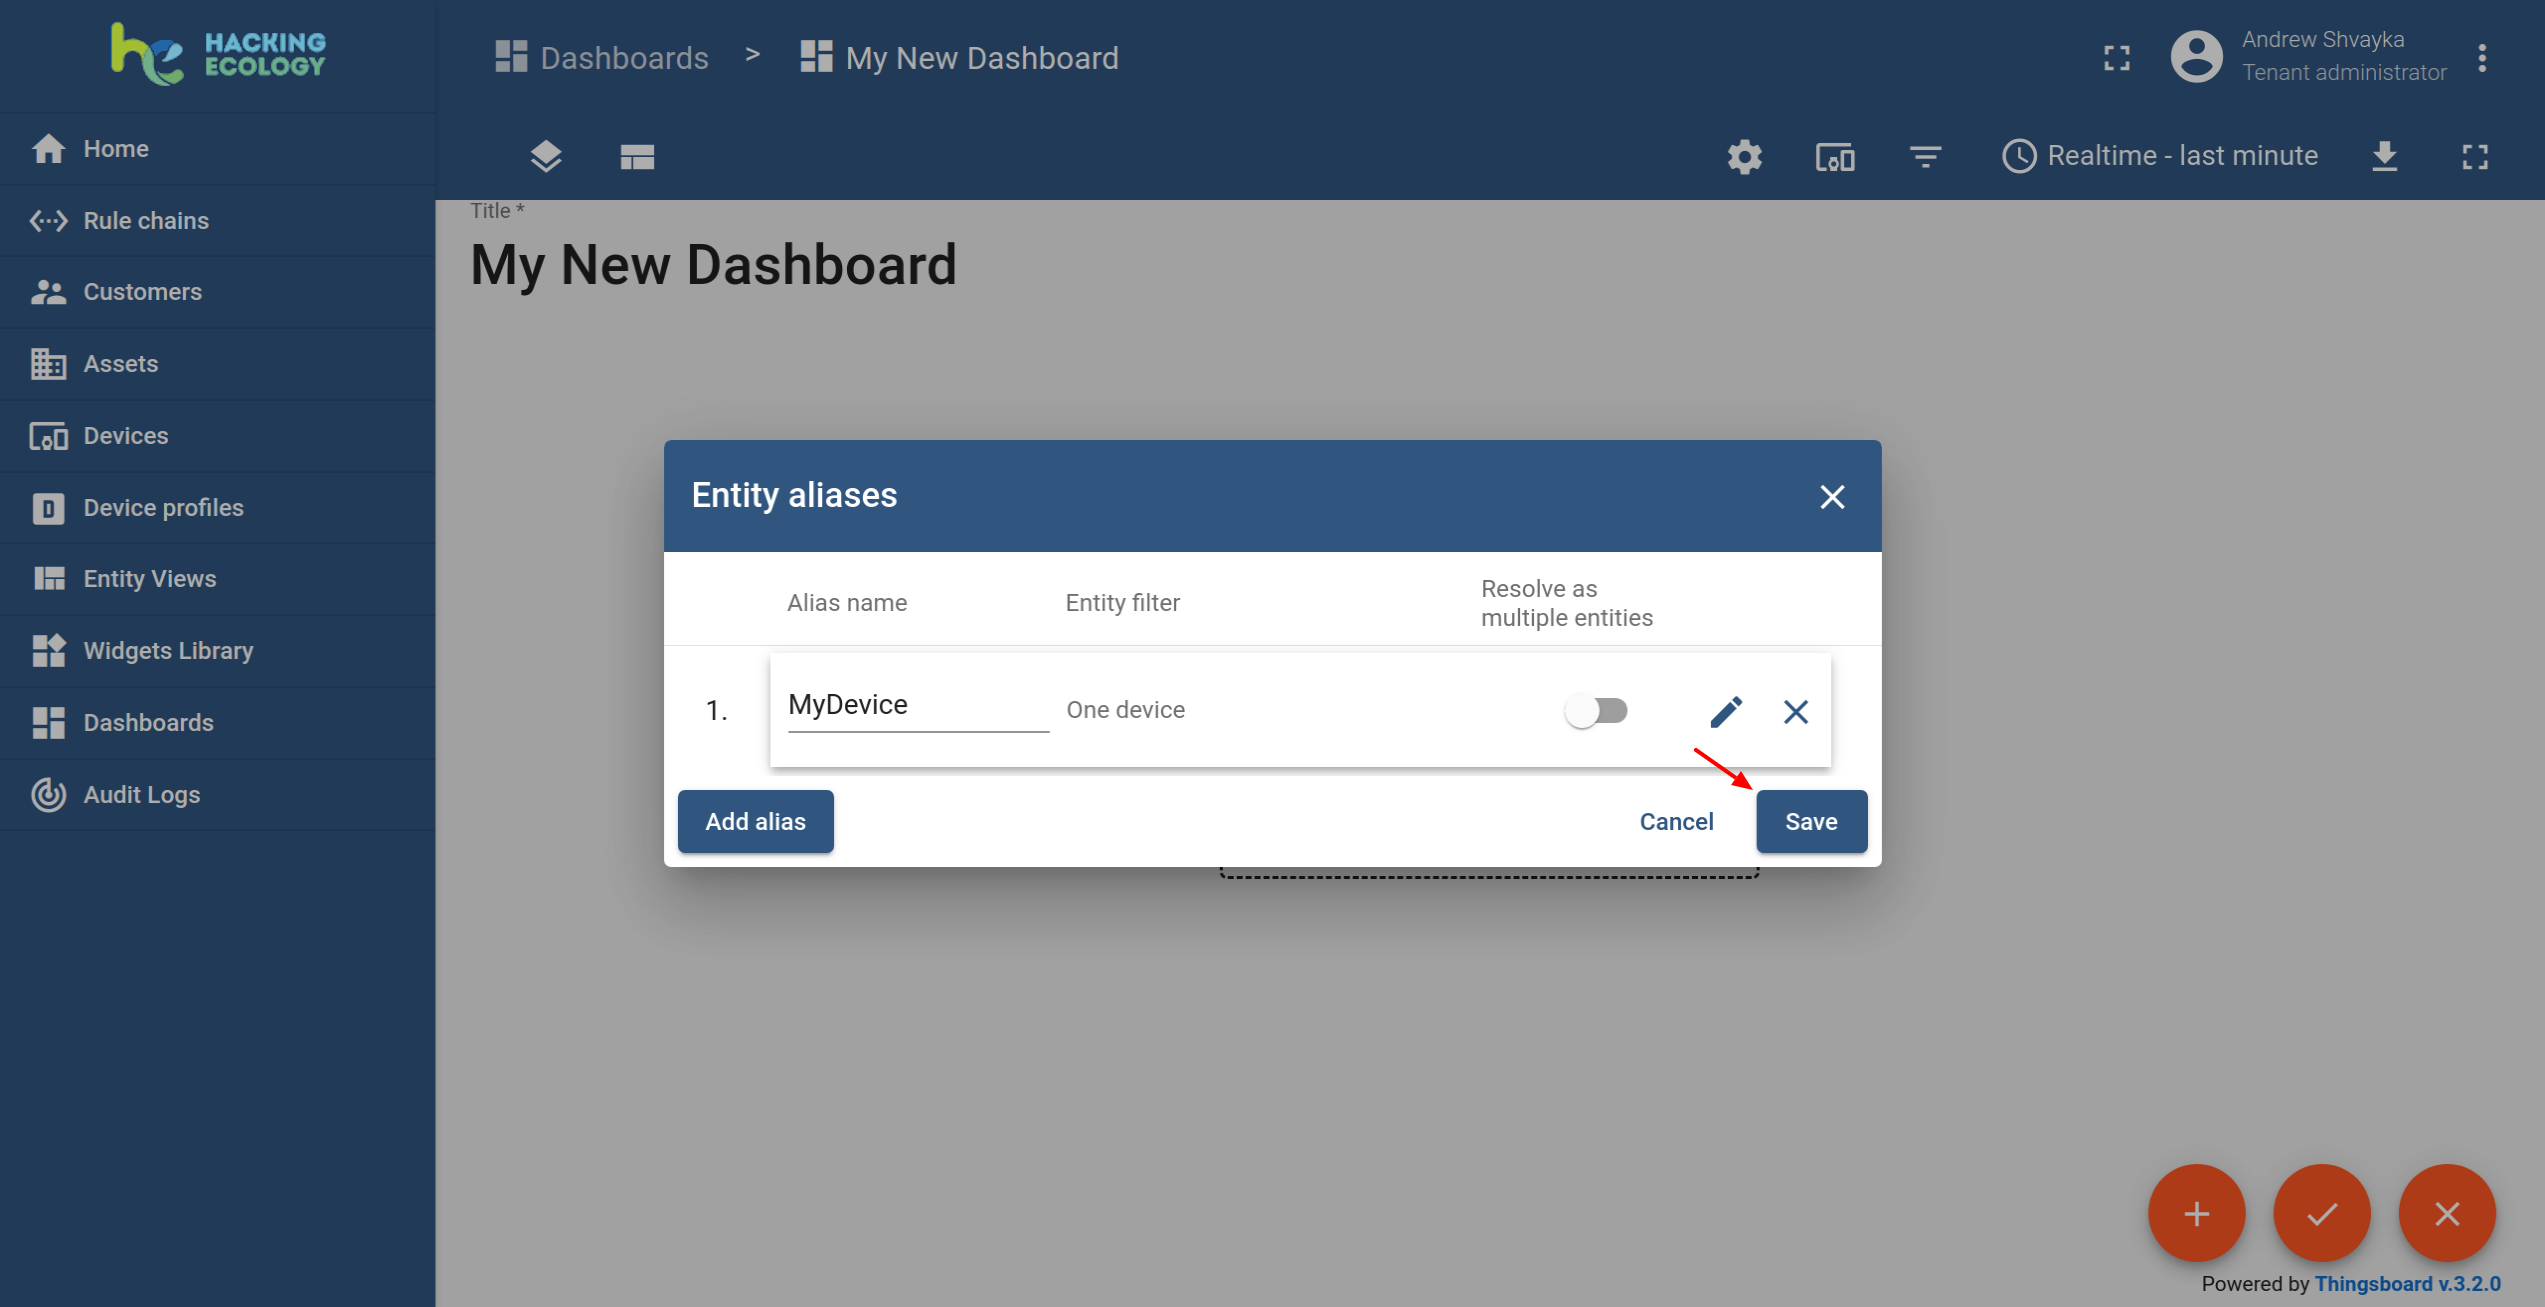
Add Alias
Alias is a reference to a single entity (Entity) or group of entities that are used in widgets. The alias can be static or dynamic. For simplicity, we will use “single entity” alias references to the single entity (eg Nayad01).
-
Enter edit mode: Click the pencil icon in the lower right corner.
-
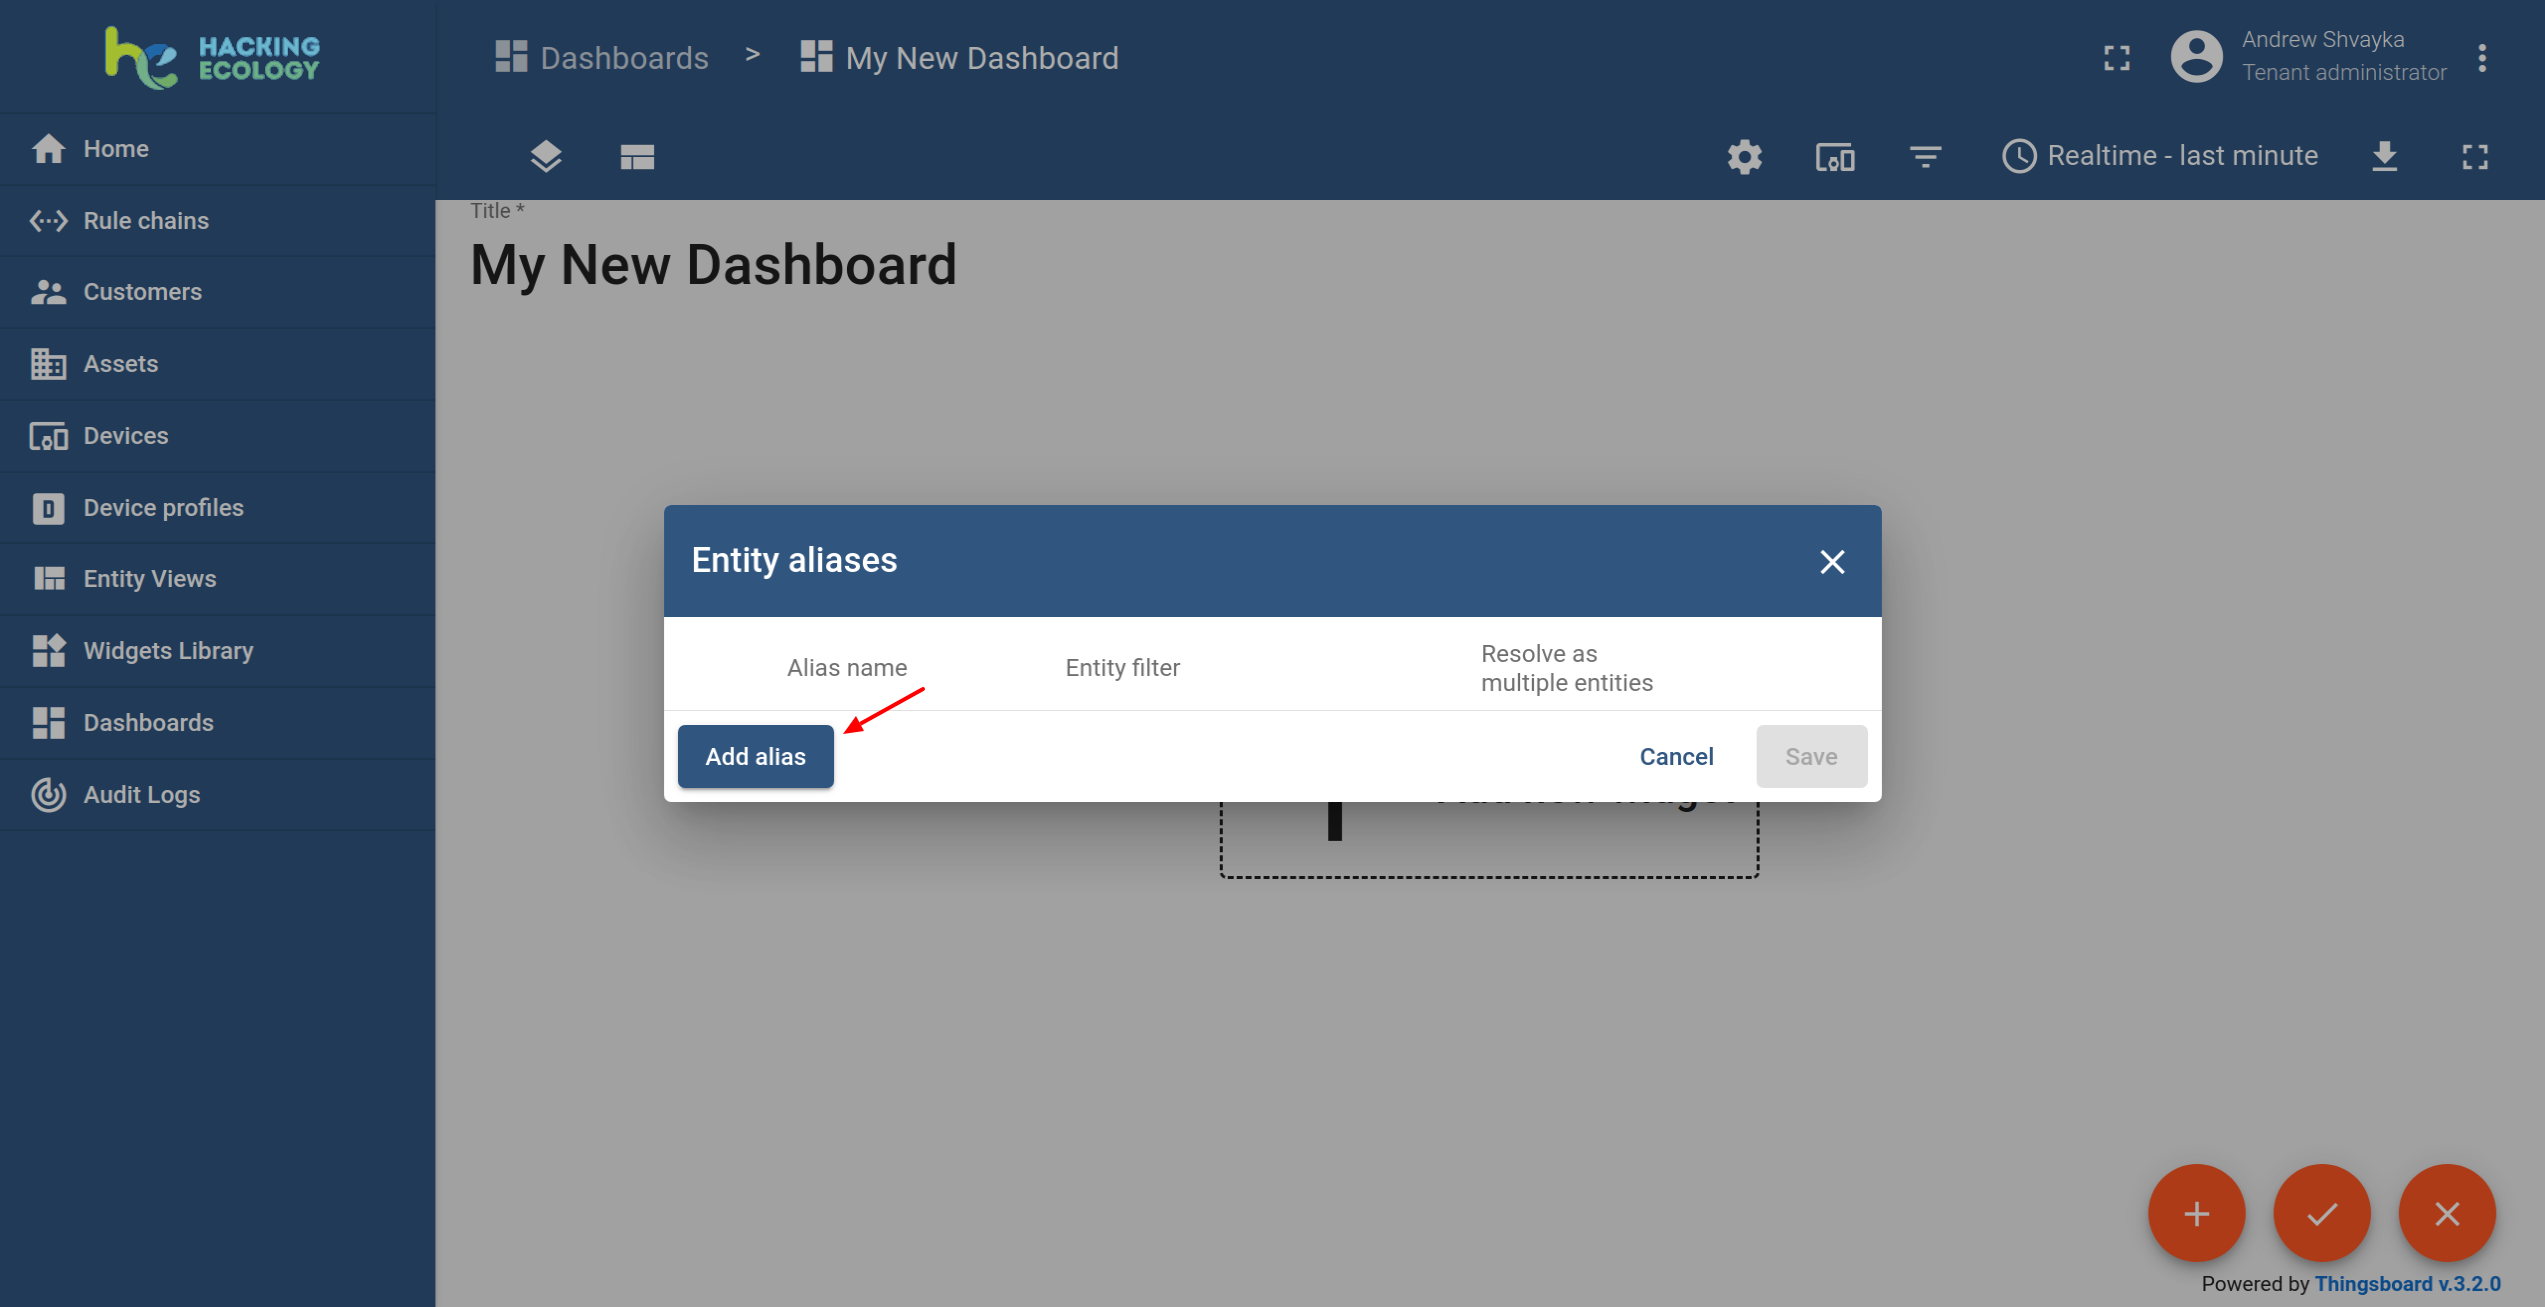
Click on the “Entity Alias” icon at the top right of the screen. You will see an empty list of aliases.

-
Click on “Add Alias”.
-
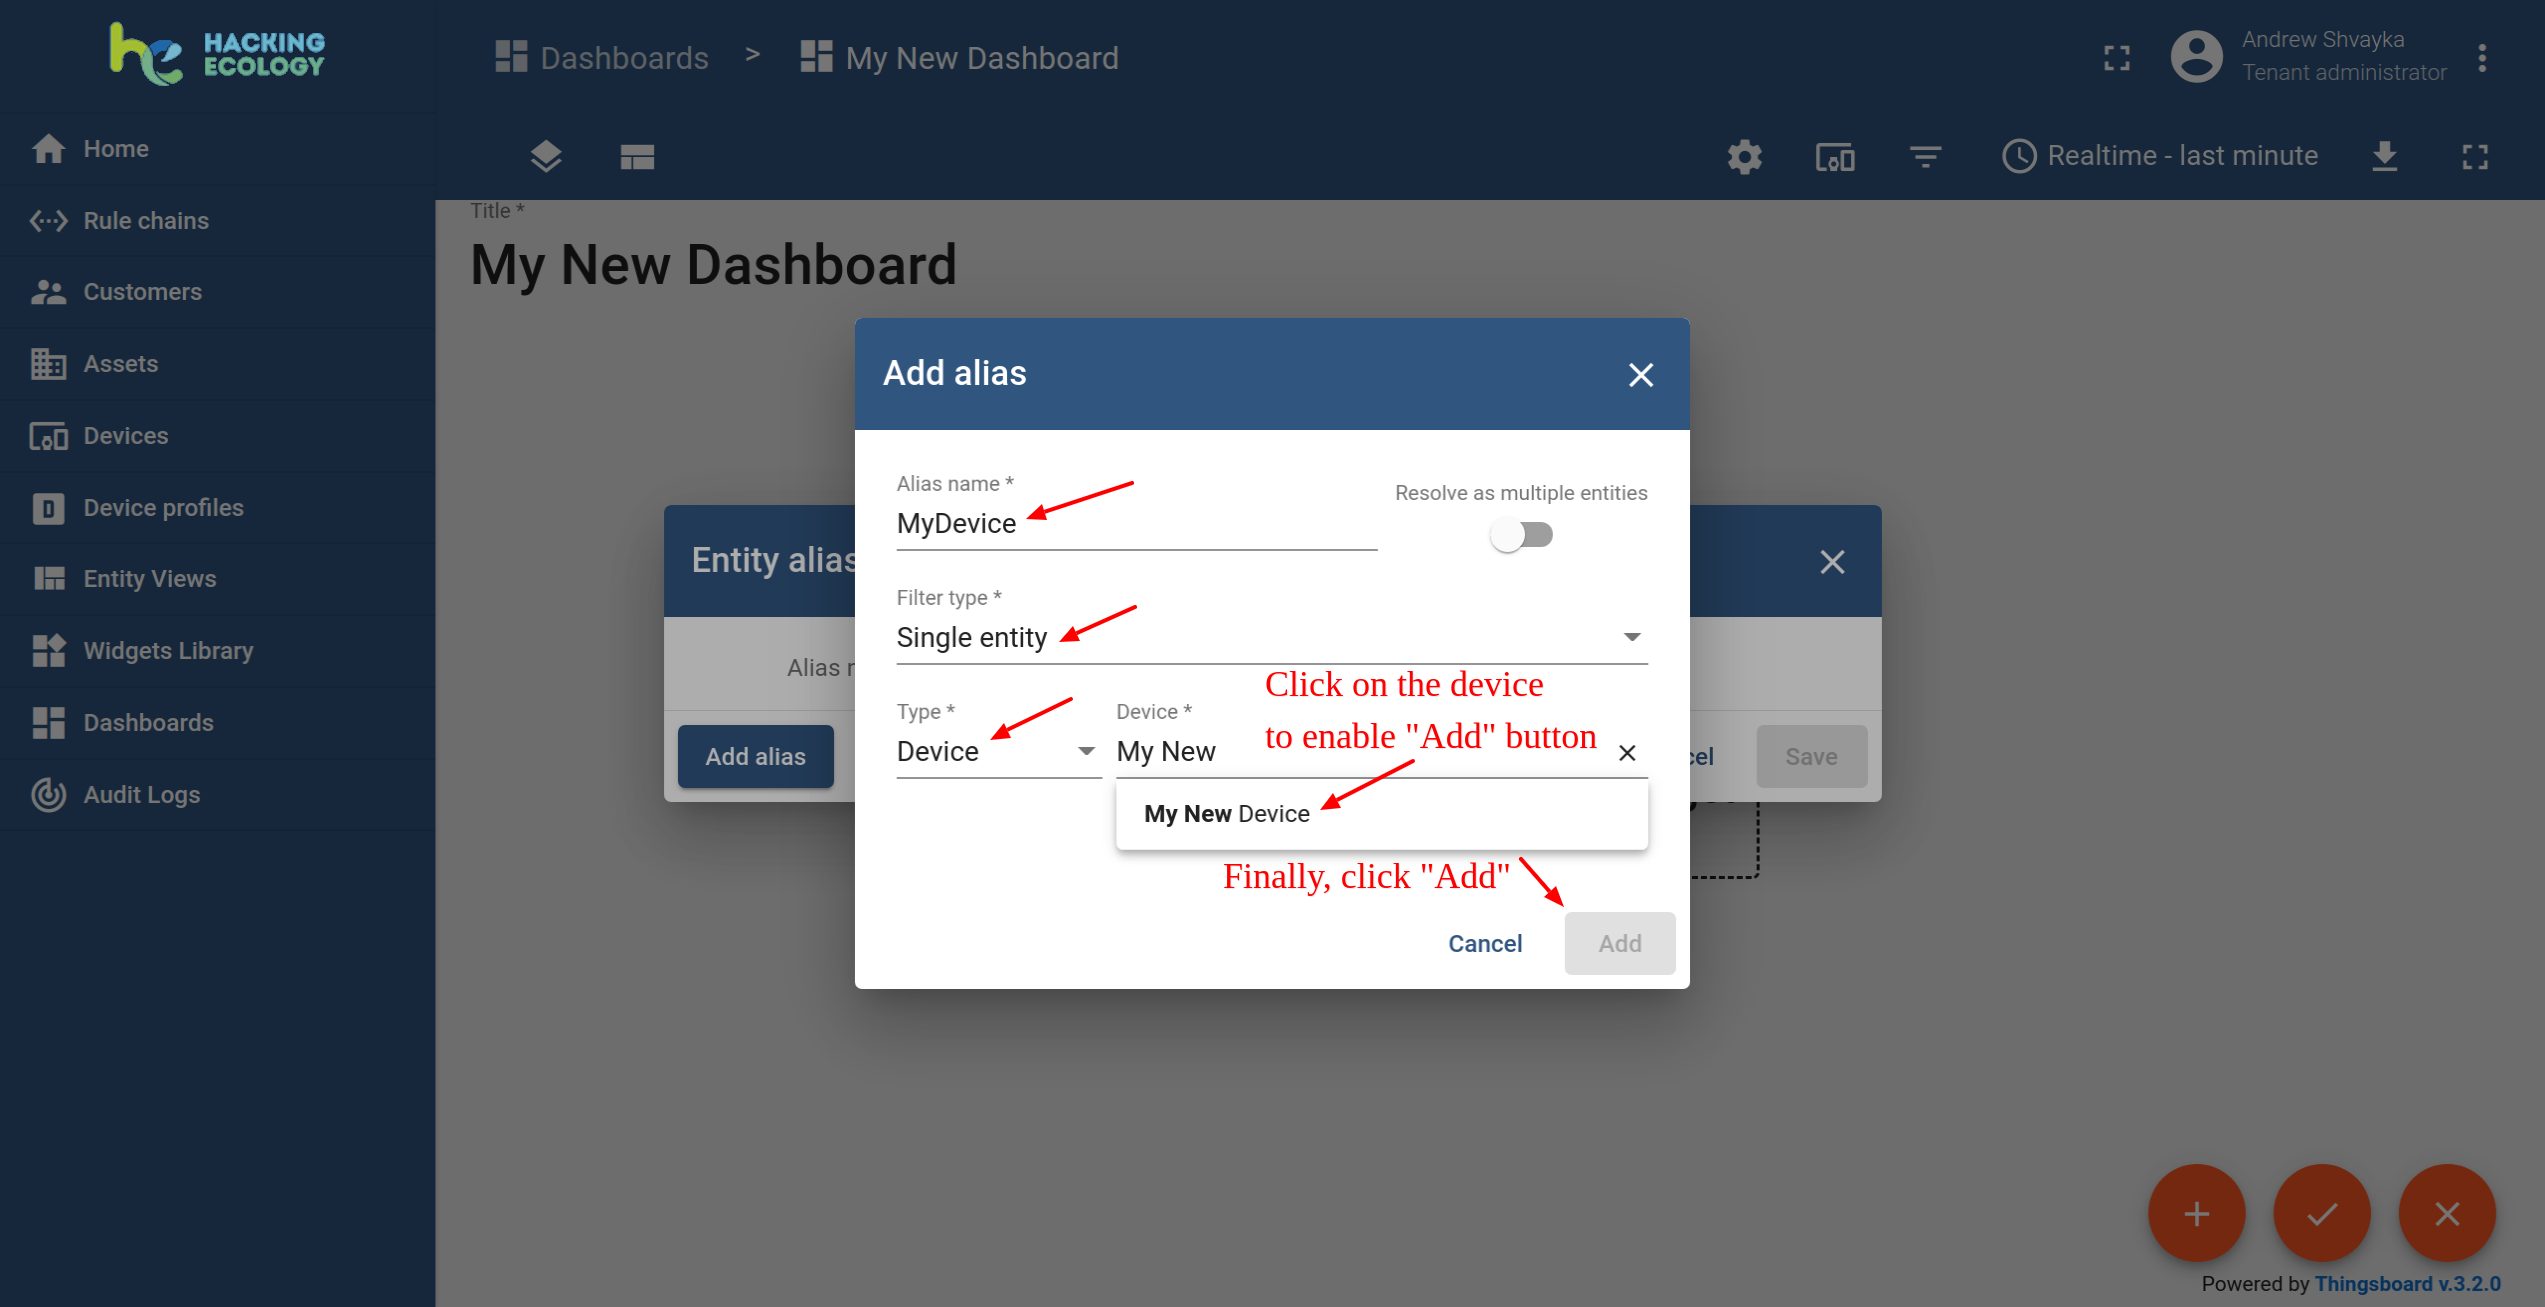
Select the input alias name, e.g. “MyDevice”.
-
Select the filter type “Single entity”. Select “Device” as the type and enter “My new” to enable autocompletion. Choose your device on autocomplete and click on it.
-
Click “Add” and then “Save”.
-
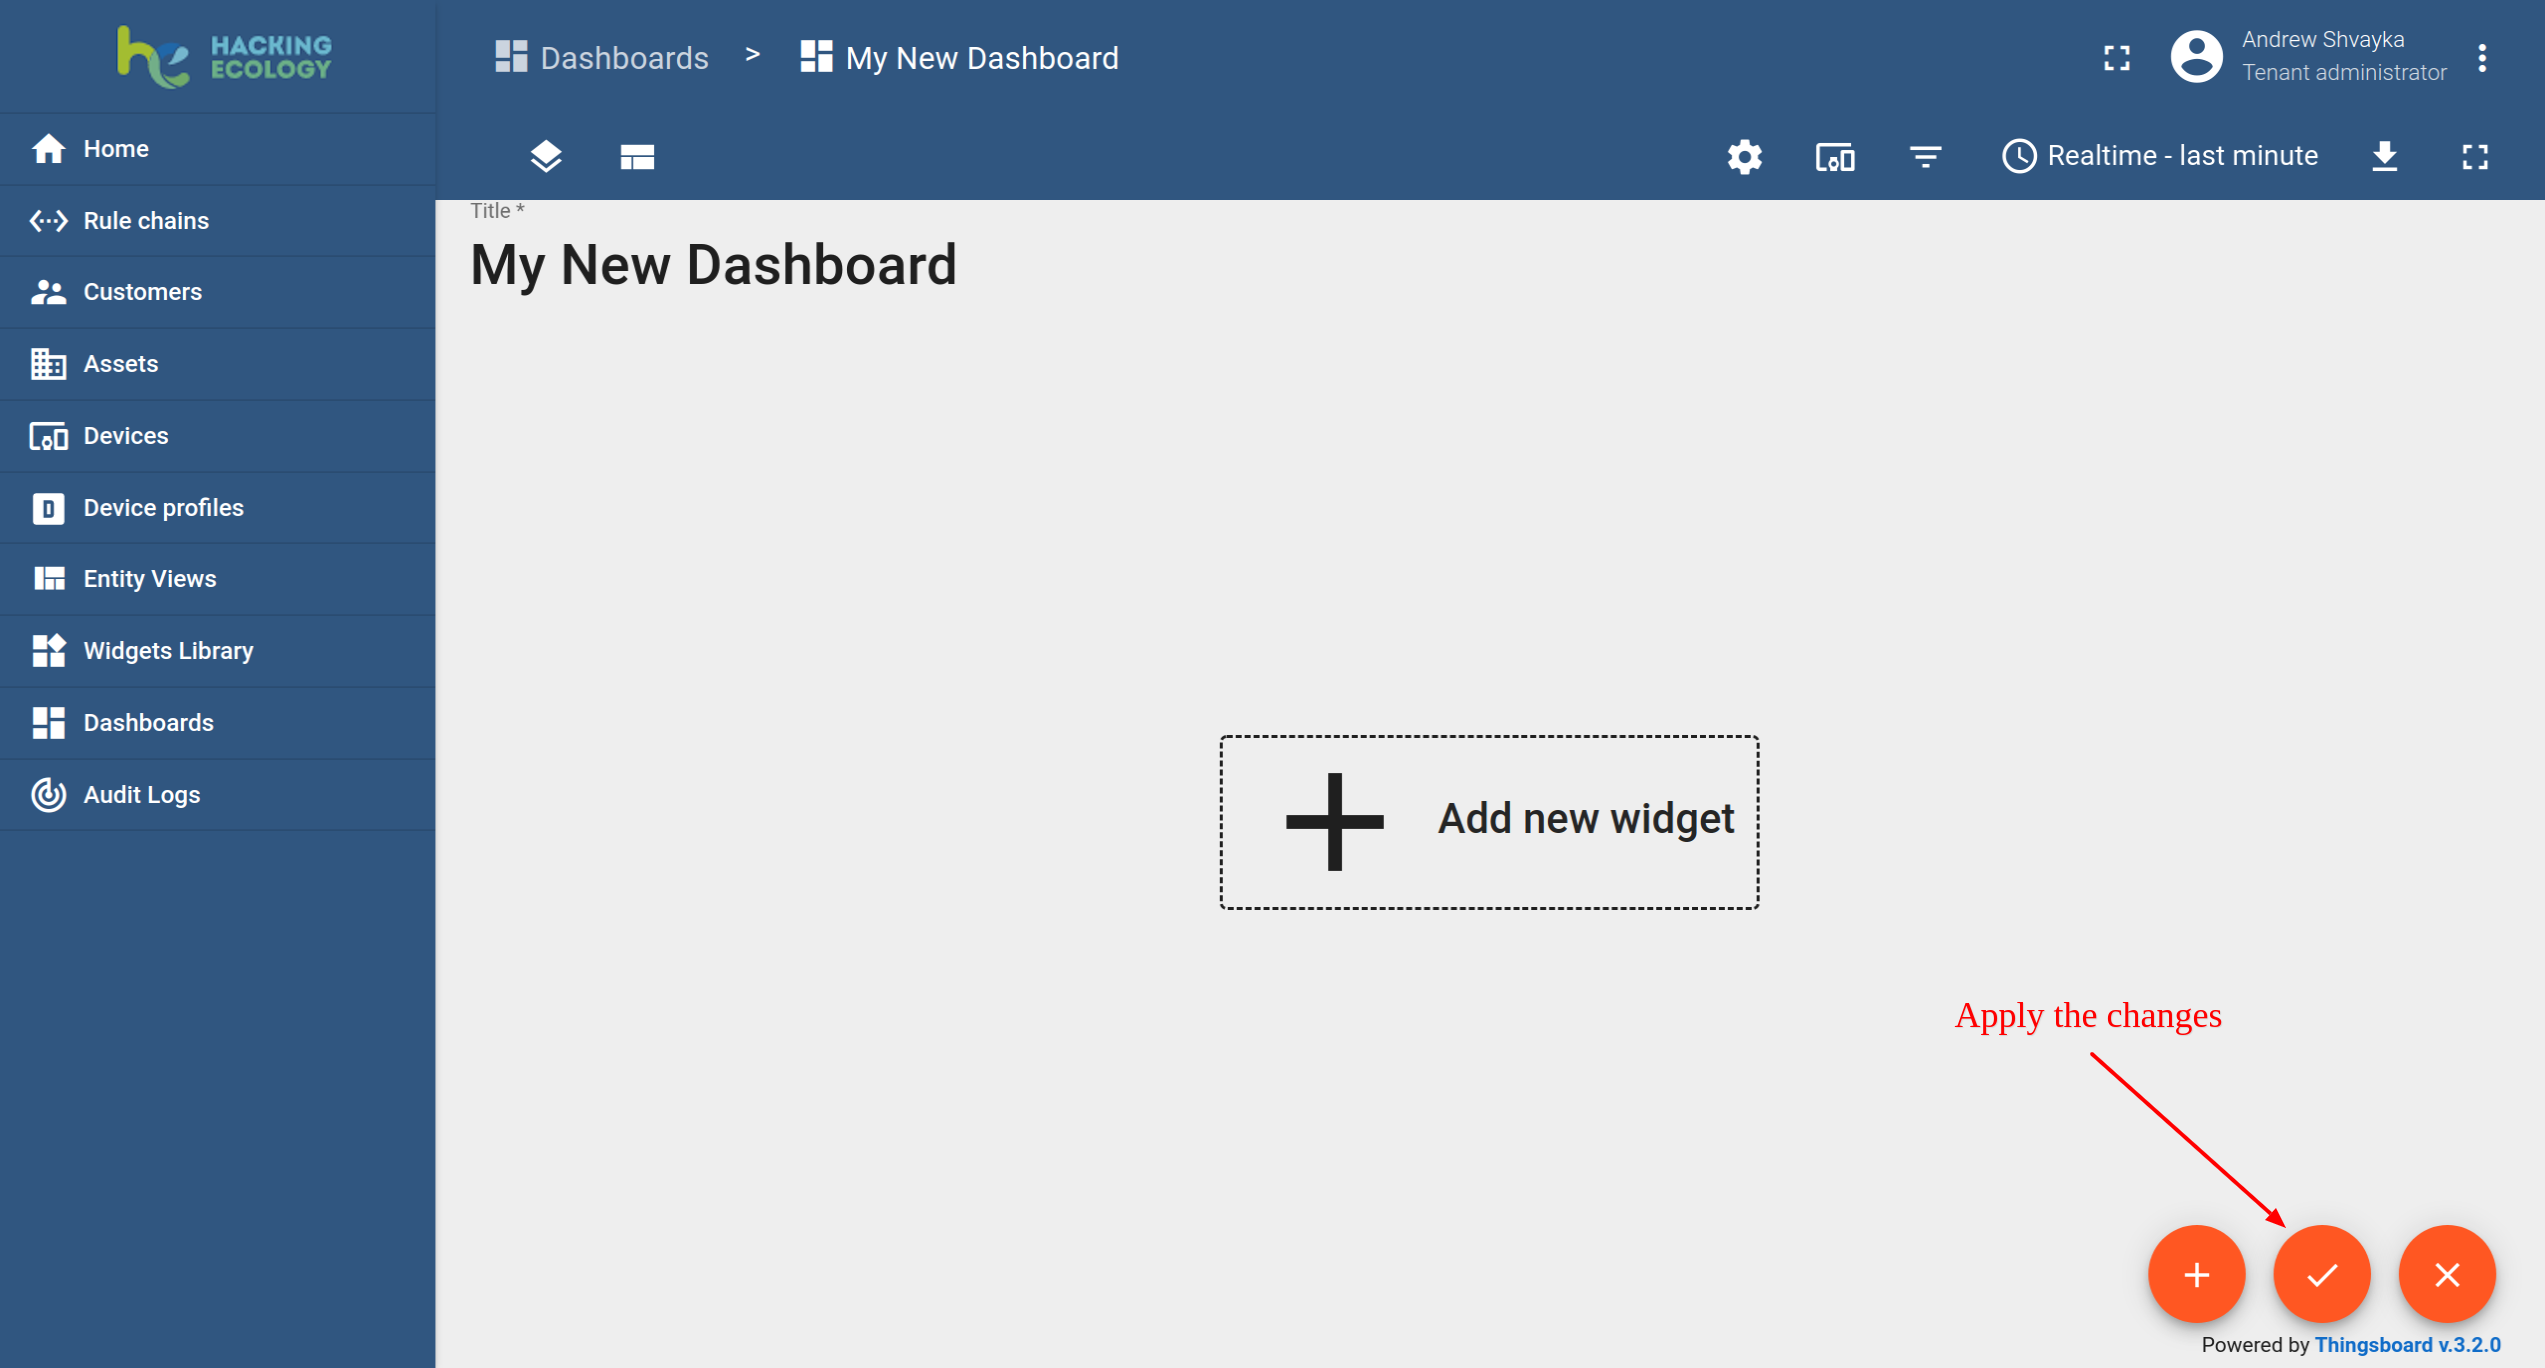
Finally, click “Apply changes” in the dashboard editor to save the changes. Then you must enter edit mode again.
Add Widget
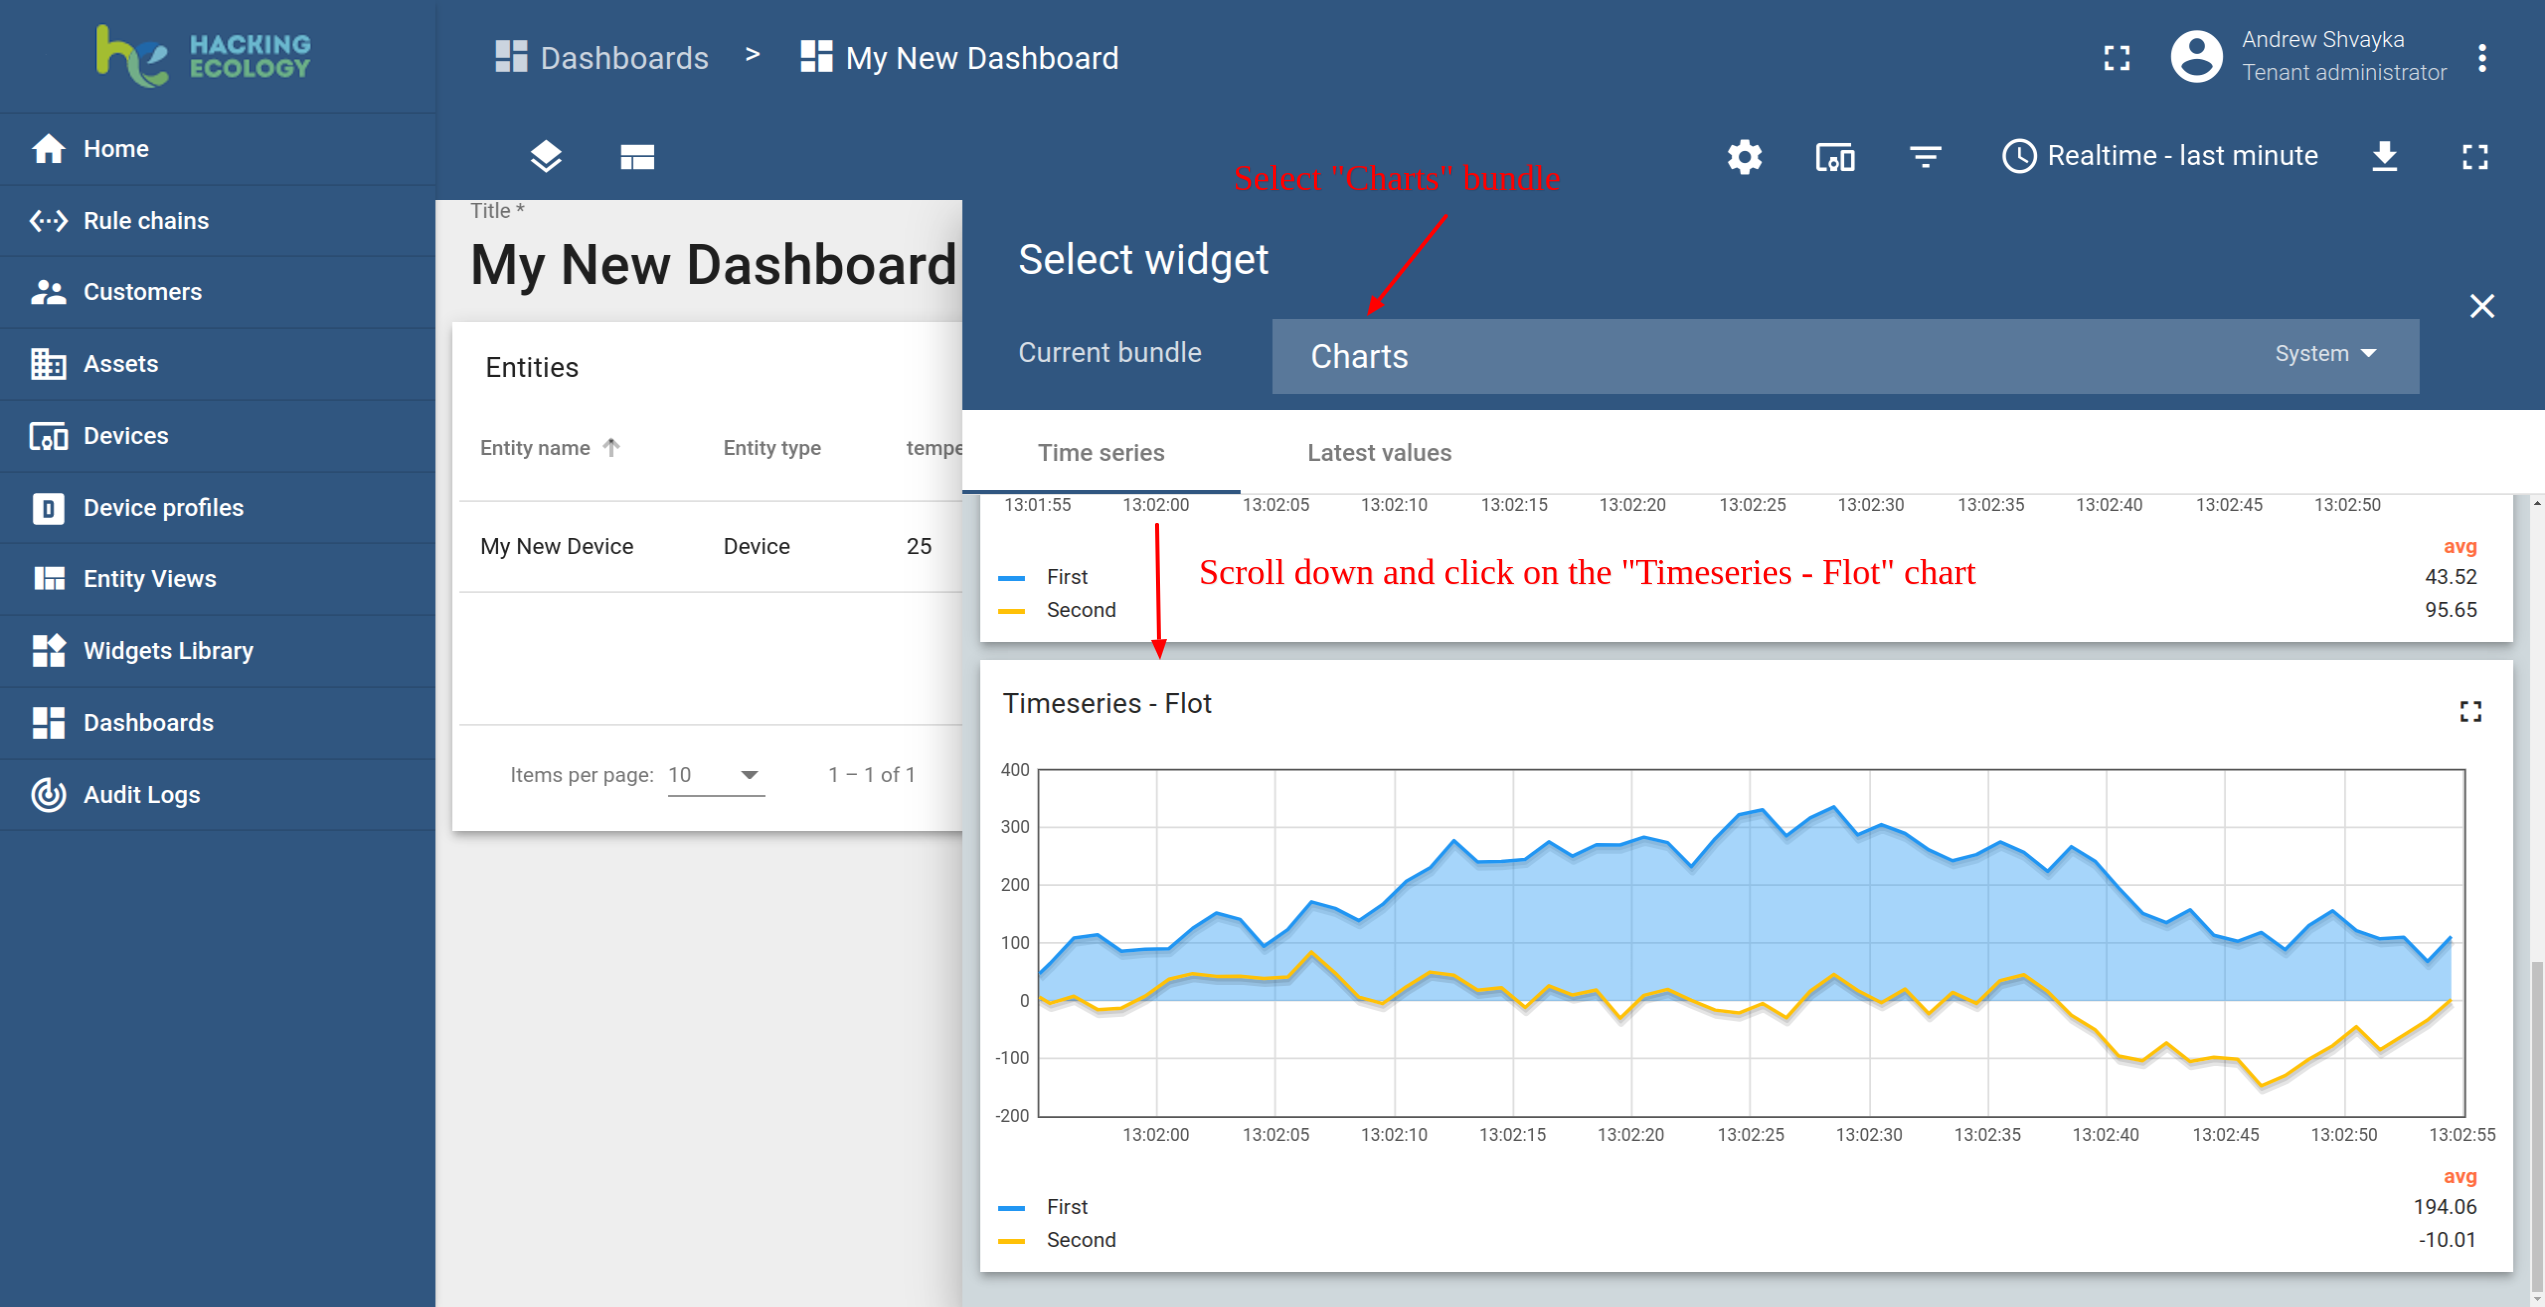
The widgets are grouped into widget packages. Each widget has its data source. Thus, each widget group has its way of displaying data. To see the latest value of the data that we send when we connect the device(s), we must configure the data source (here we use temperature as an example).
-
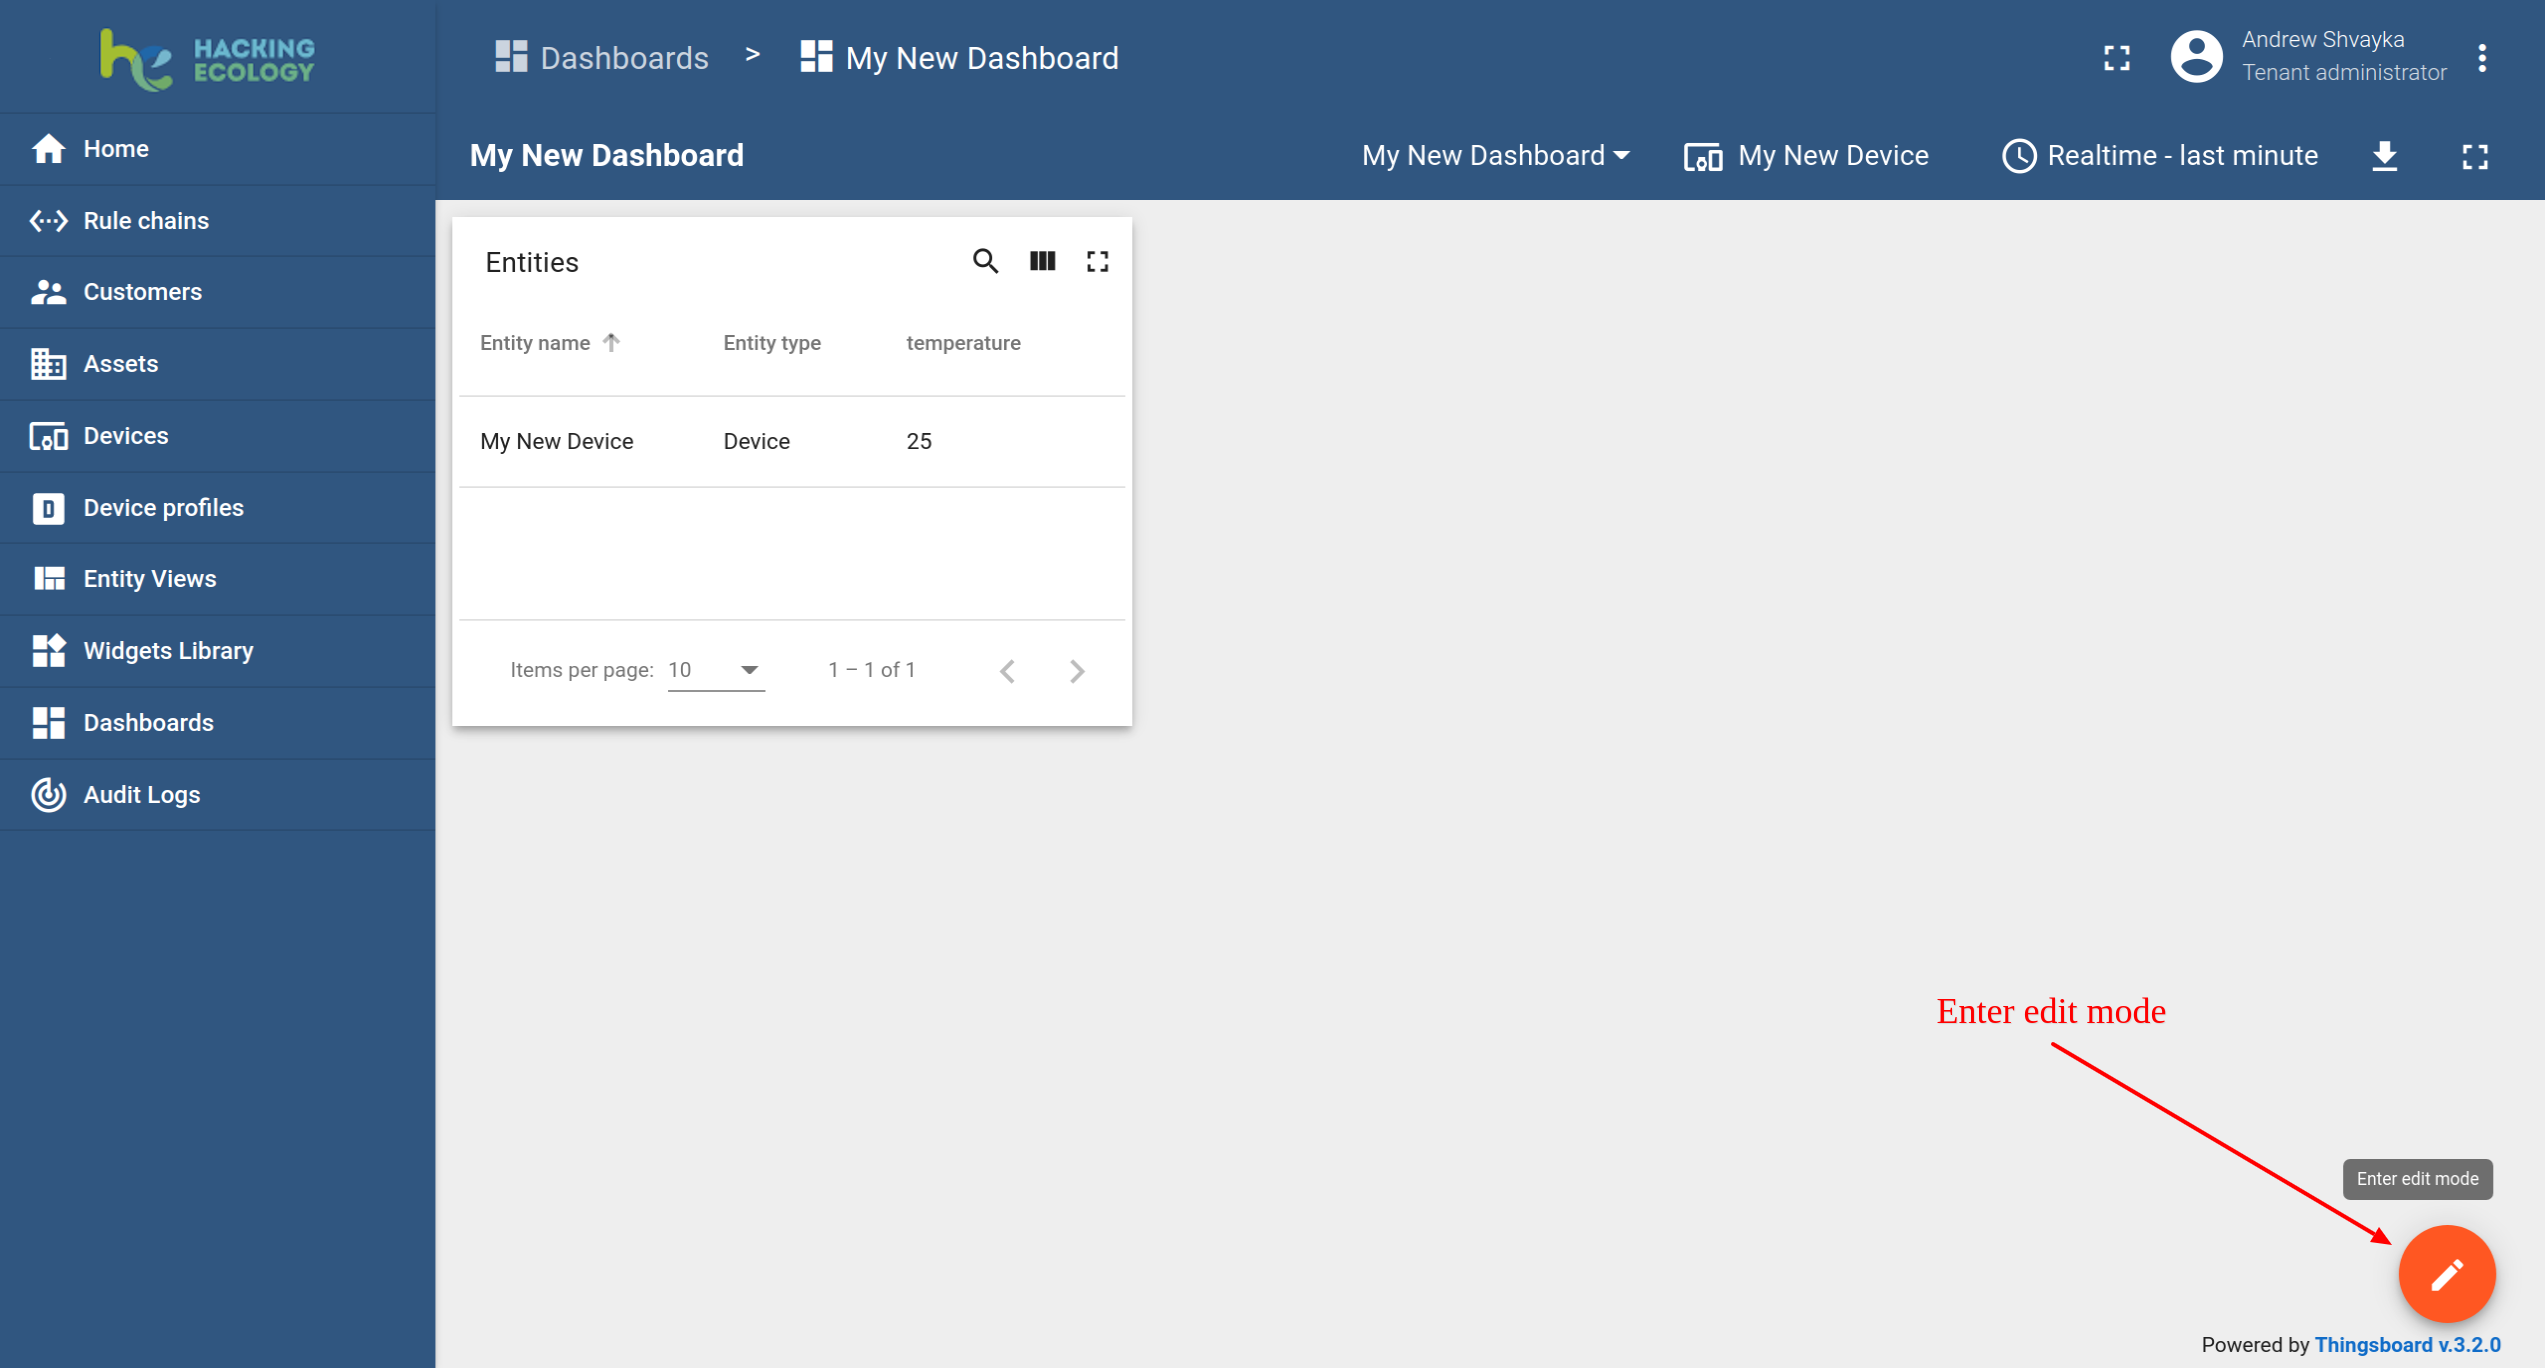
Enter edit mode. Click on the “Add New widget” button.

-
Select the “Card” widget package. Select the “Last Values” tab. Click the Entities widget header. The “Add widget” window will appear.
-
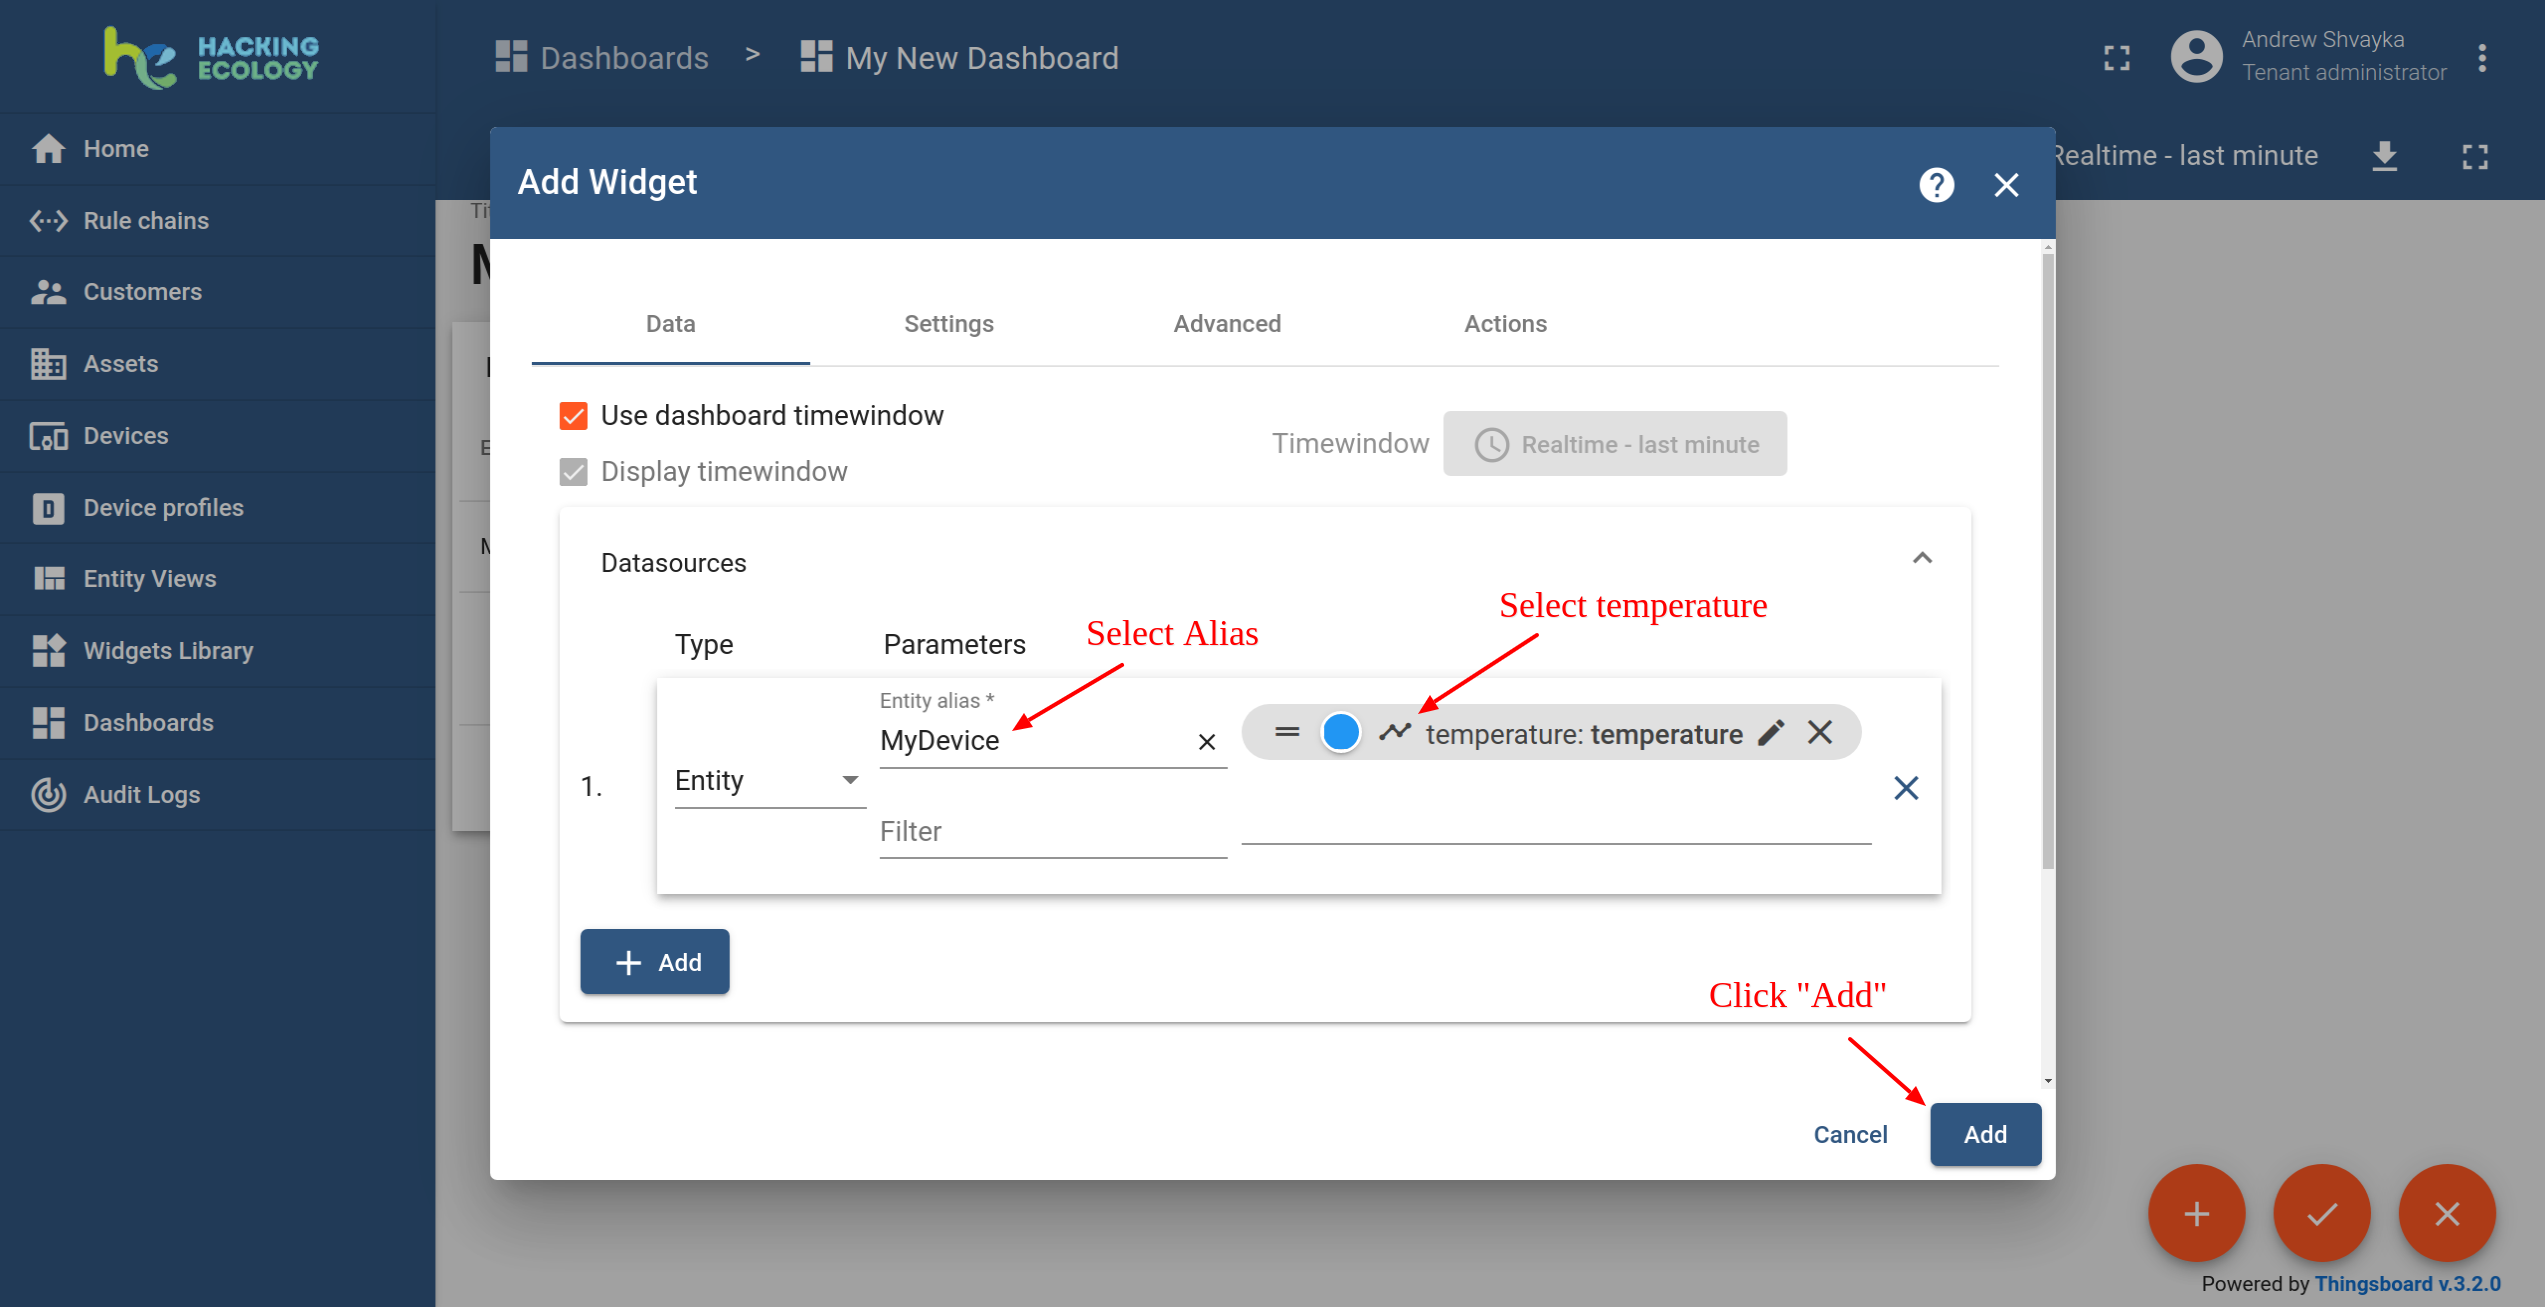
Click “Add” to add the data source. A widget can have multiple data sources, you just need add the other sources using the previous steps.
-
Select the entity’s alias (in this example it is called “MyDevice”). Then click on the input field on the right. Auto-completion with available data points will be displayed. Select the data point and click “Add”.
-
Resize the widget to make it a little bigger. Just drag the bottom right corner of the widget. You can also play around with advanced settings if you want to edit the widget.